Capture companion + film stitching · Mac
Make detailed film scans at home.
€199Planned one-time price for a perpetual v1 licence, including VAT
€149 once, including VAT, for Pilot testers who try their own scans and share feedback. Perpetual v1 licence at commercial release; purchase is optional.
Already photographing your negatives in overlapping shots? EmulsionGrid brings planning, retakes and film stitching into one workflow. Keep your chosen shots together in Lightroom Classic, prepare the files and stitch on your Mac. Your negatives stay with you.
The built-in offline demo lets you plan a scan, track captures and simulate retakes without a licence. Lightroom Classic selection and stitching require a separately issued Pilot licence.
Pilot licences are not being issued yet. Downloading does not start the 30-day period.
Third-party source & relinking materials — 236 MB
Free by invitation · no purchase required. Apply now for future Pilot access.
A difficult scan, joined into one image.
Stephansdom · 4×5 negative · 40 shots · previews scaled for this page
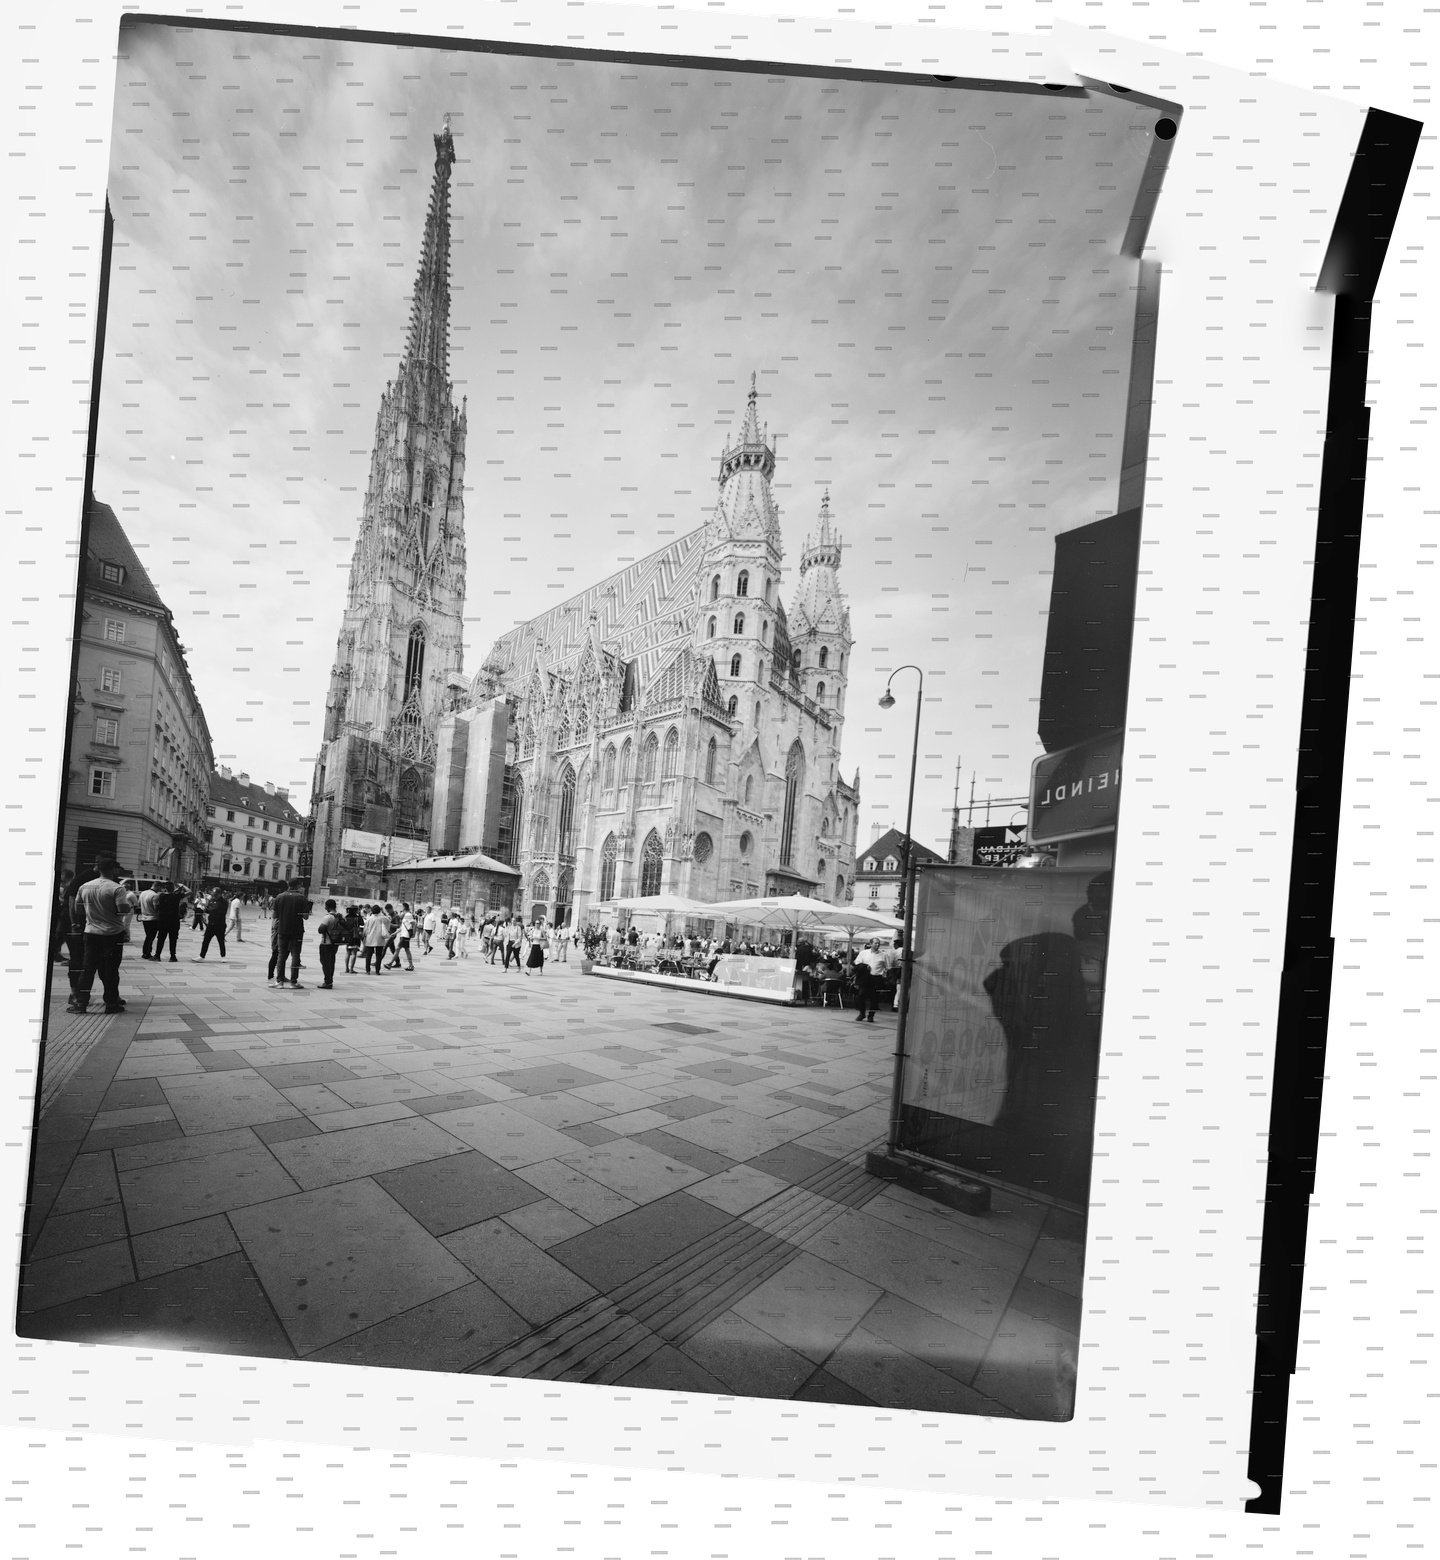
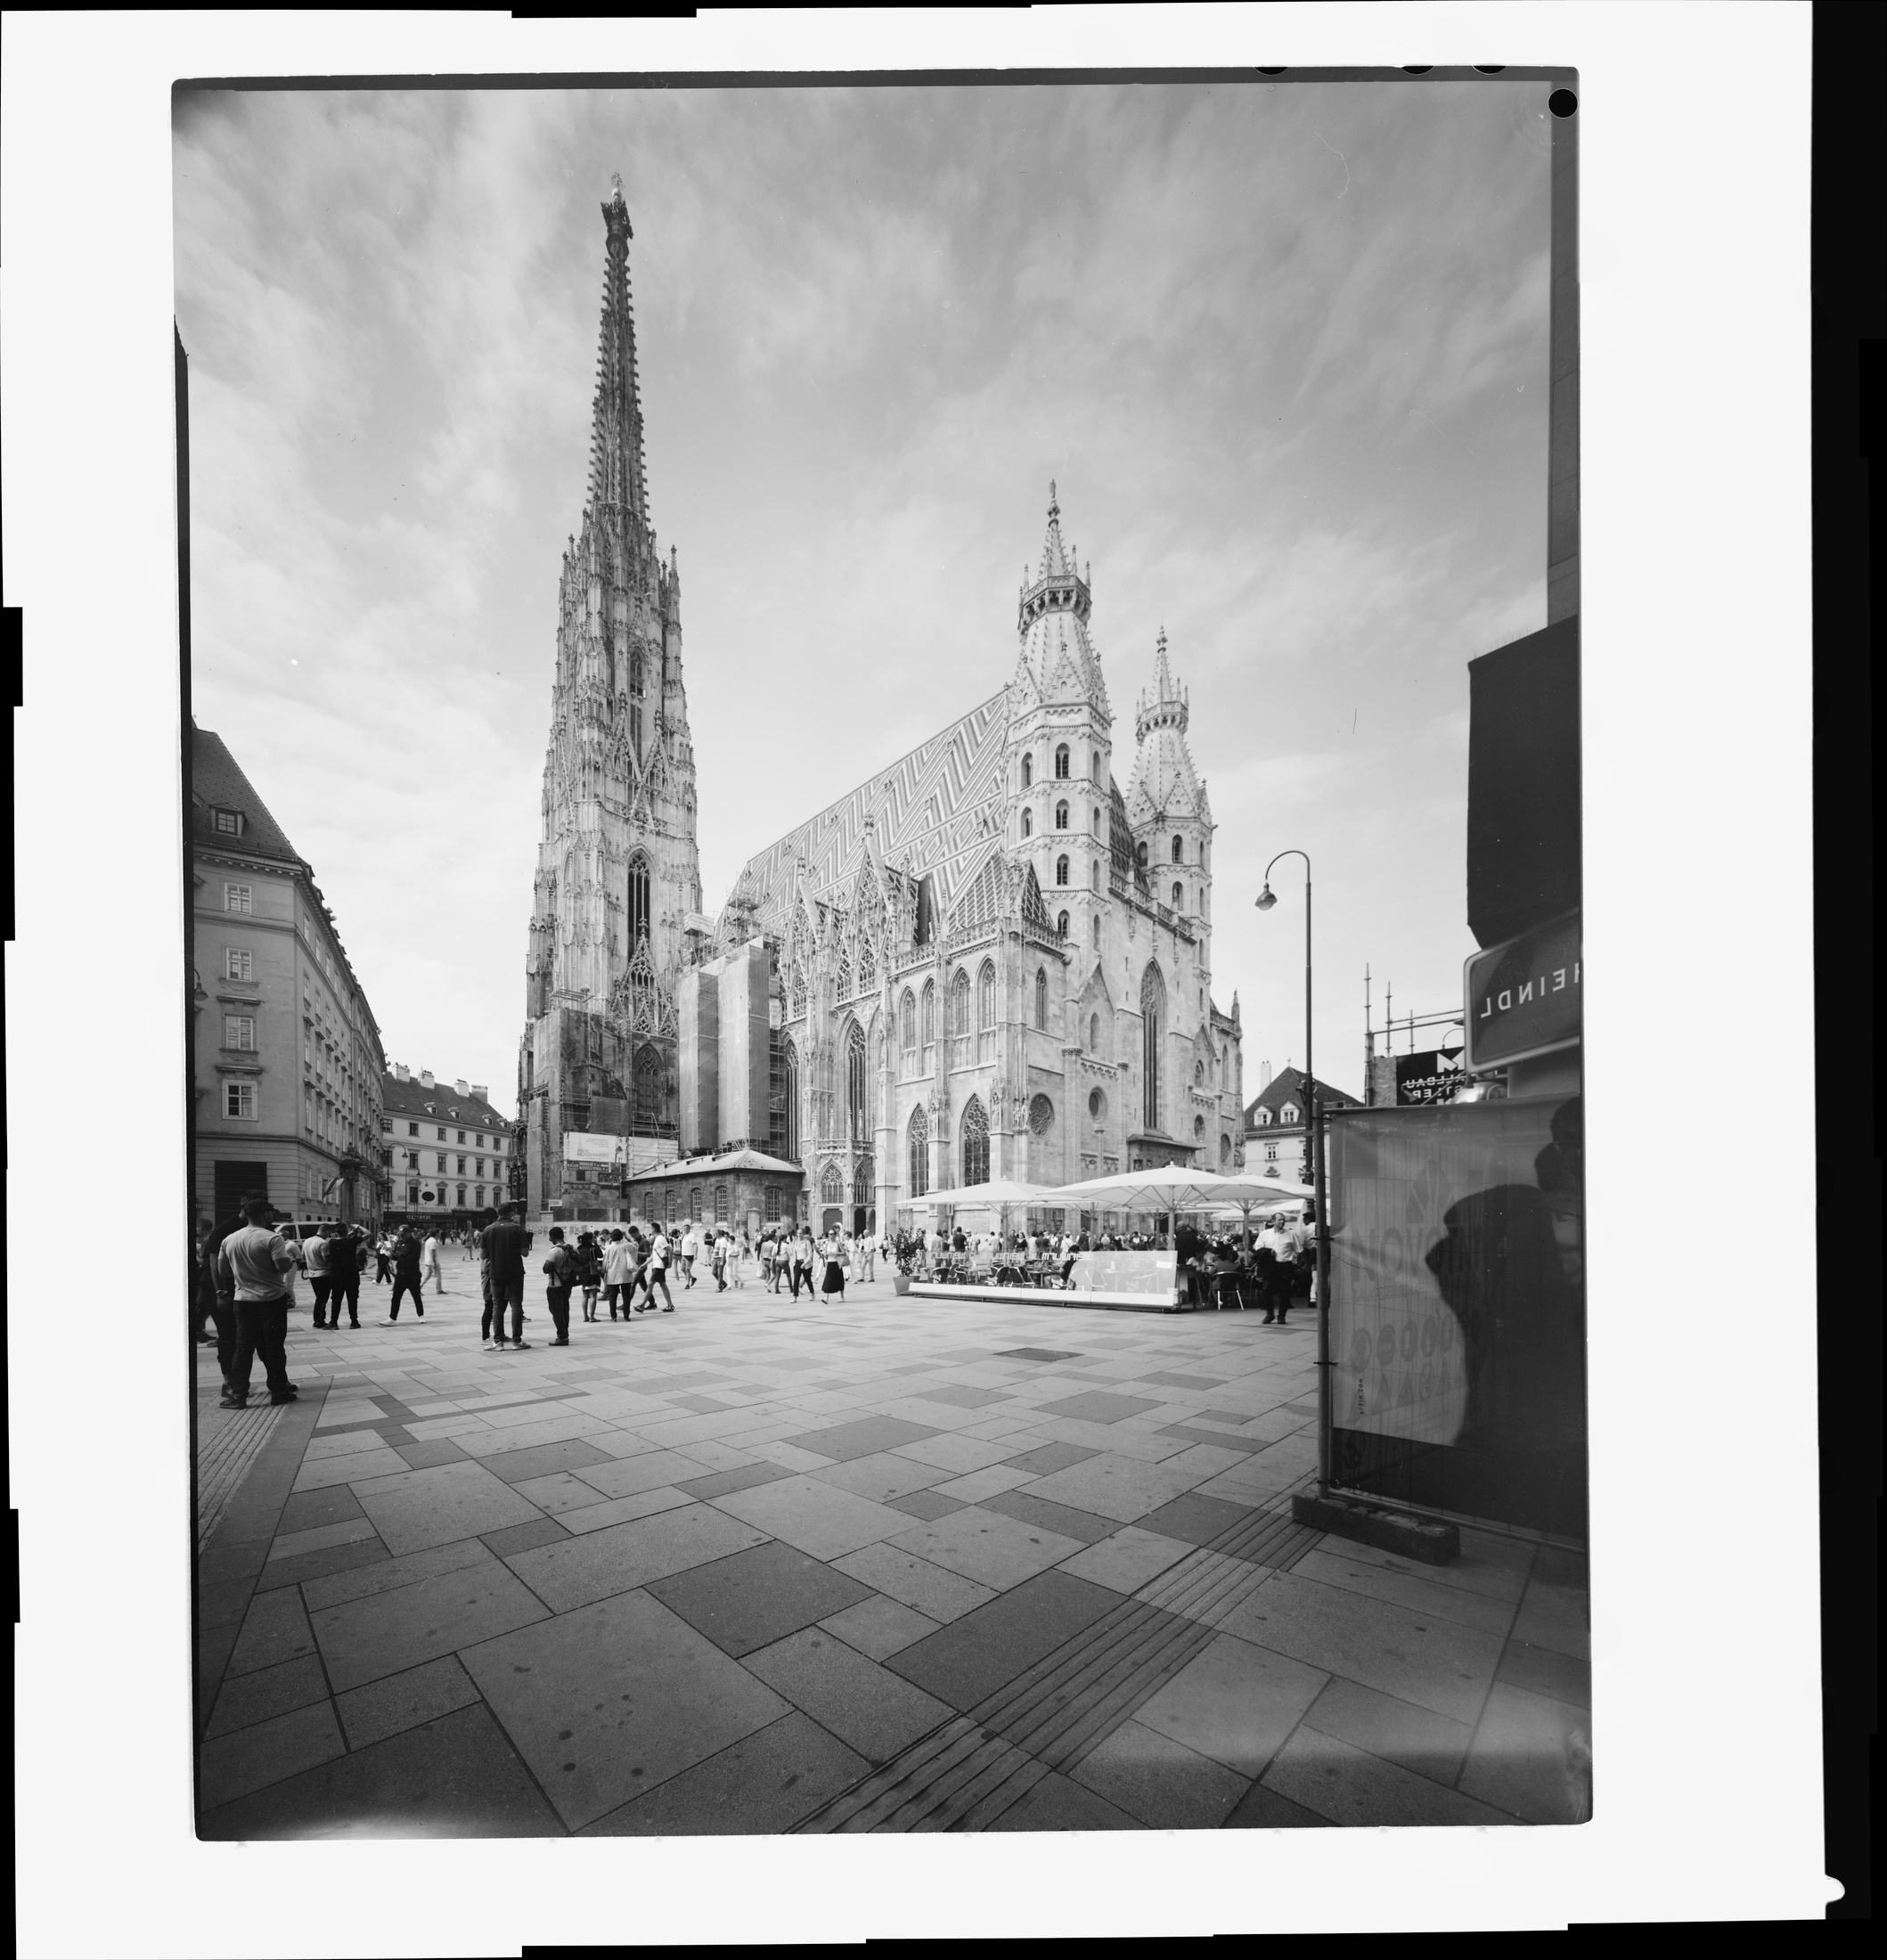
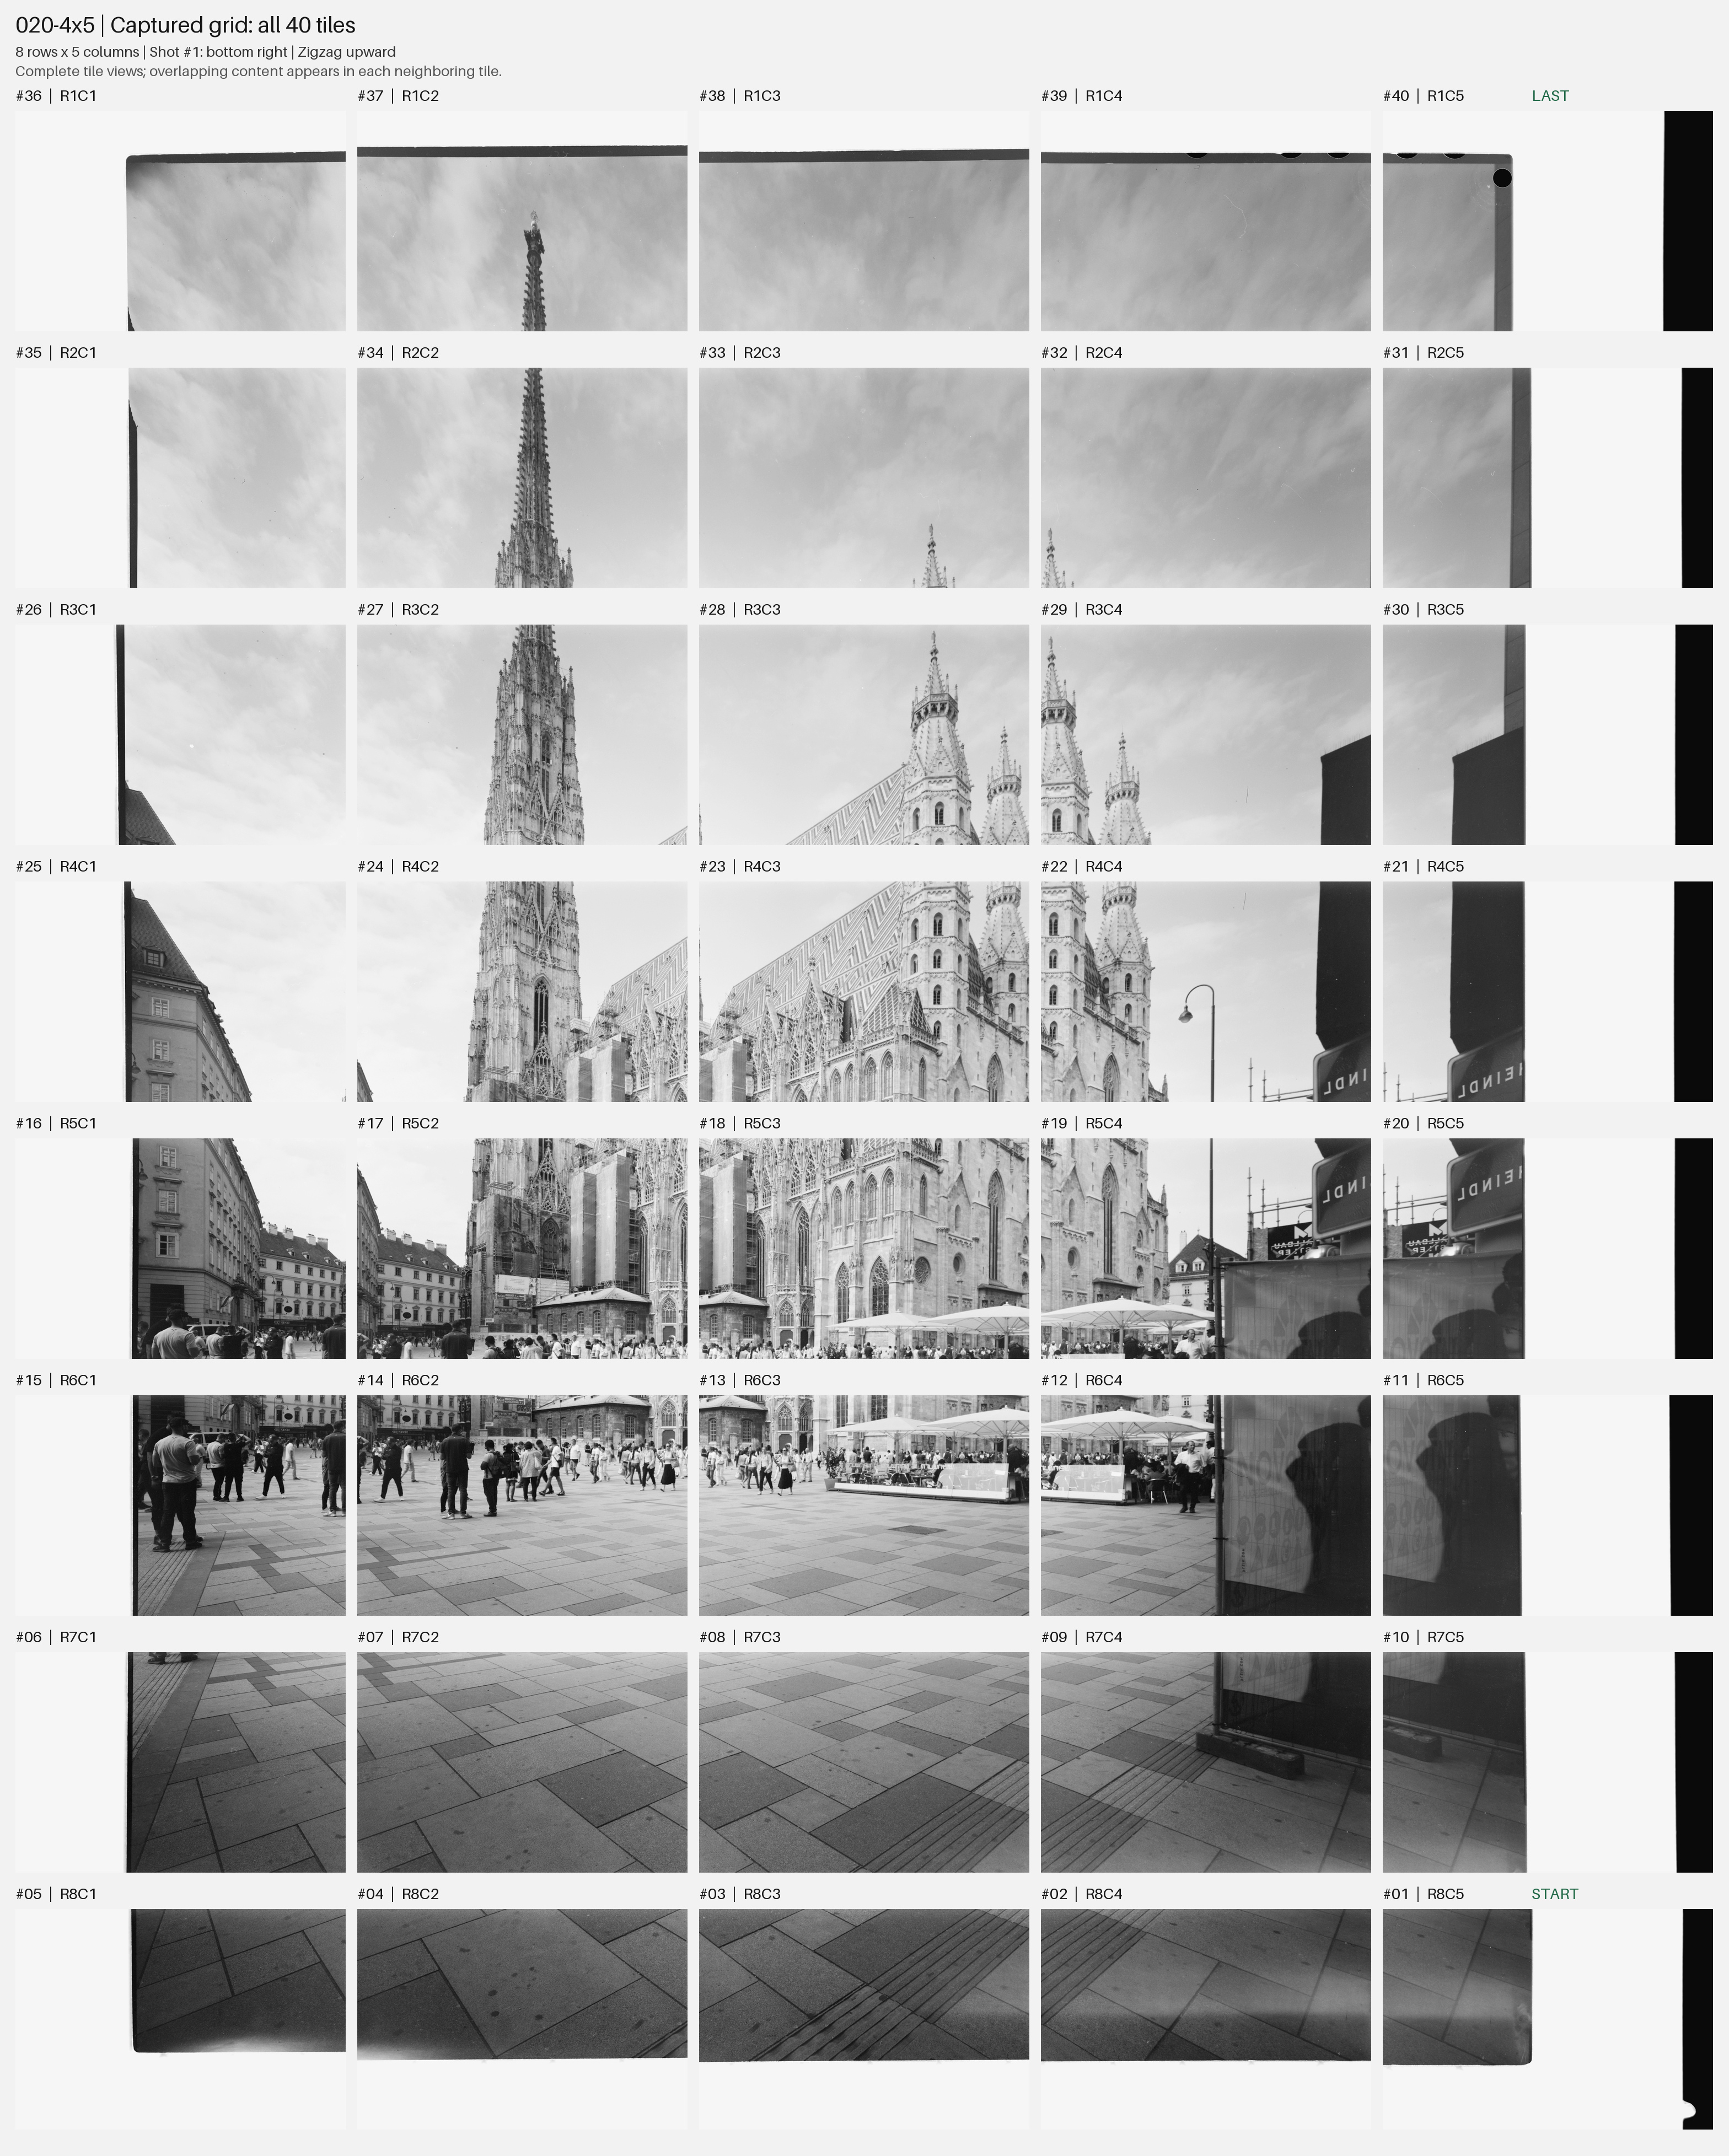
Whole-image previews show the shape and borders at different magnifications. Open a result to inspect the preview; the native details below show pixels from the accepted EmulsionGrid output.
Look closer at the scan.
4×5 Fujifilm Acros · Developed in 510 Pyro
These small previews link to crops at the original pixel dimensions. Open a detail and select “Show at 100%” to inspect it without page-fit reduction.
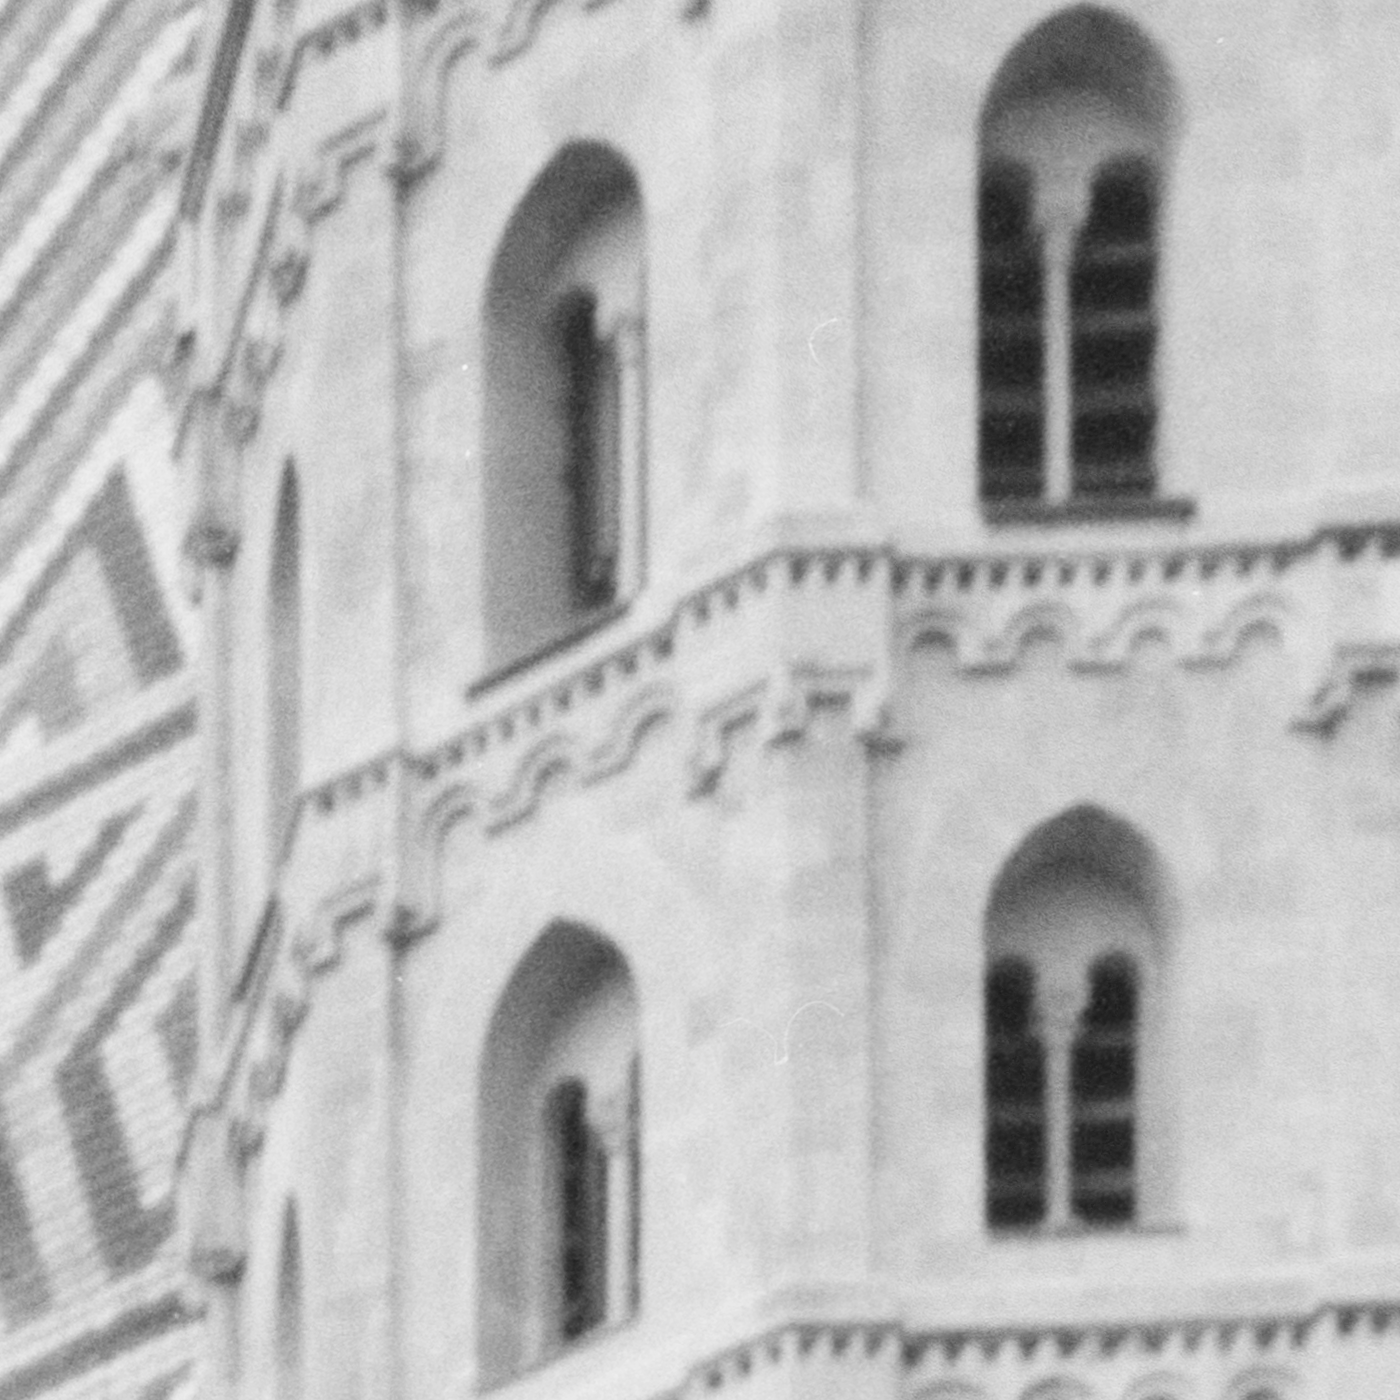
Roof tiles and stonework. 1,400 × 1,400 source pixels.
Sky texture and film grain. 1,400 × 1,400 source pixels.
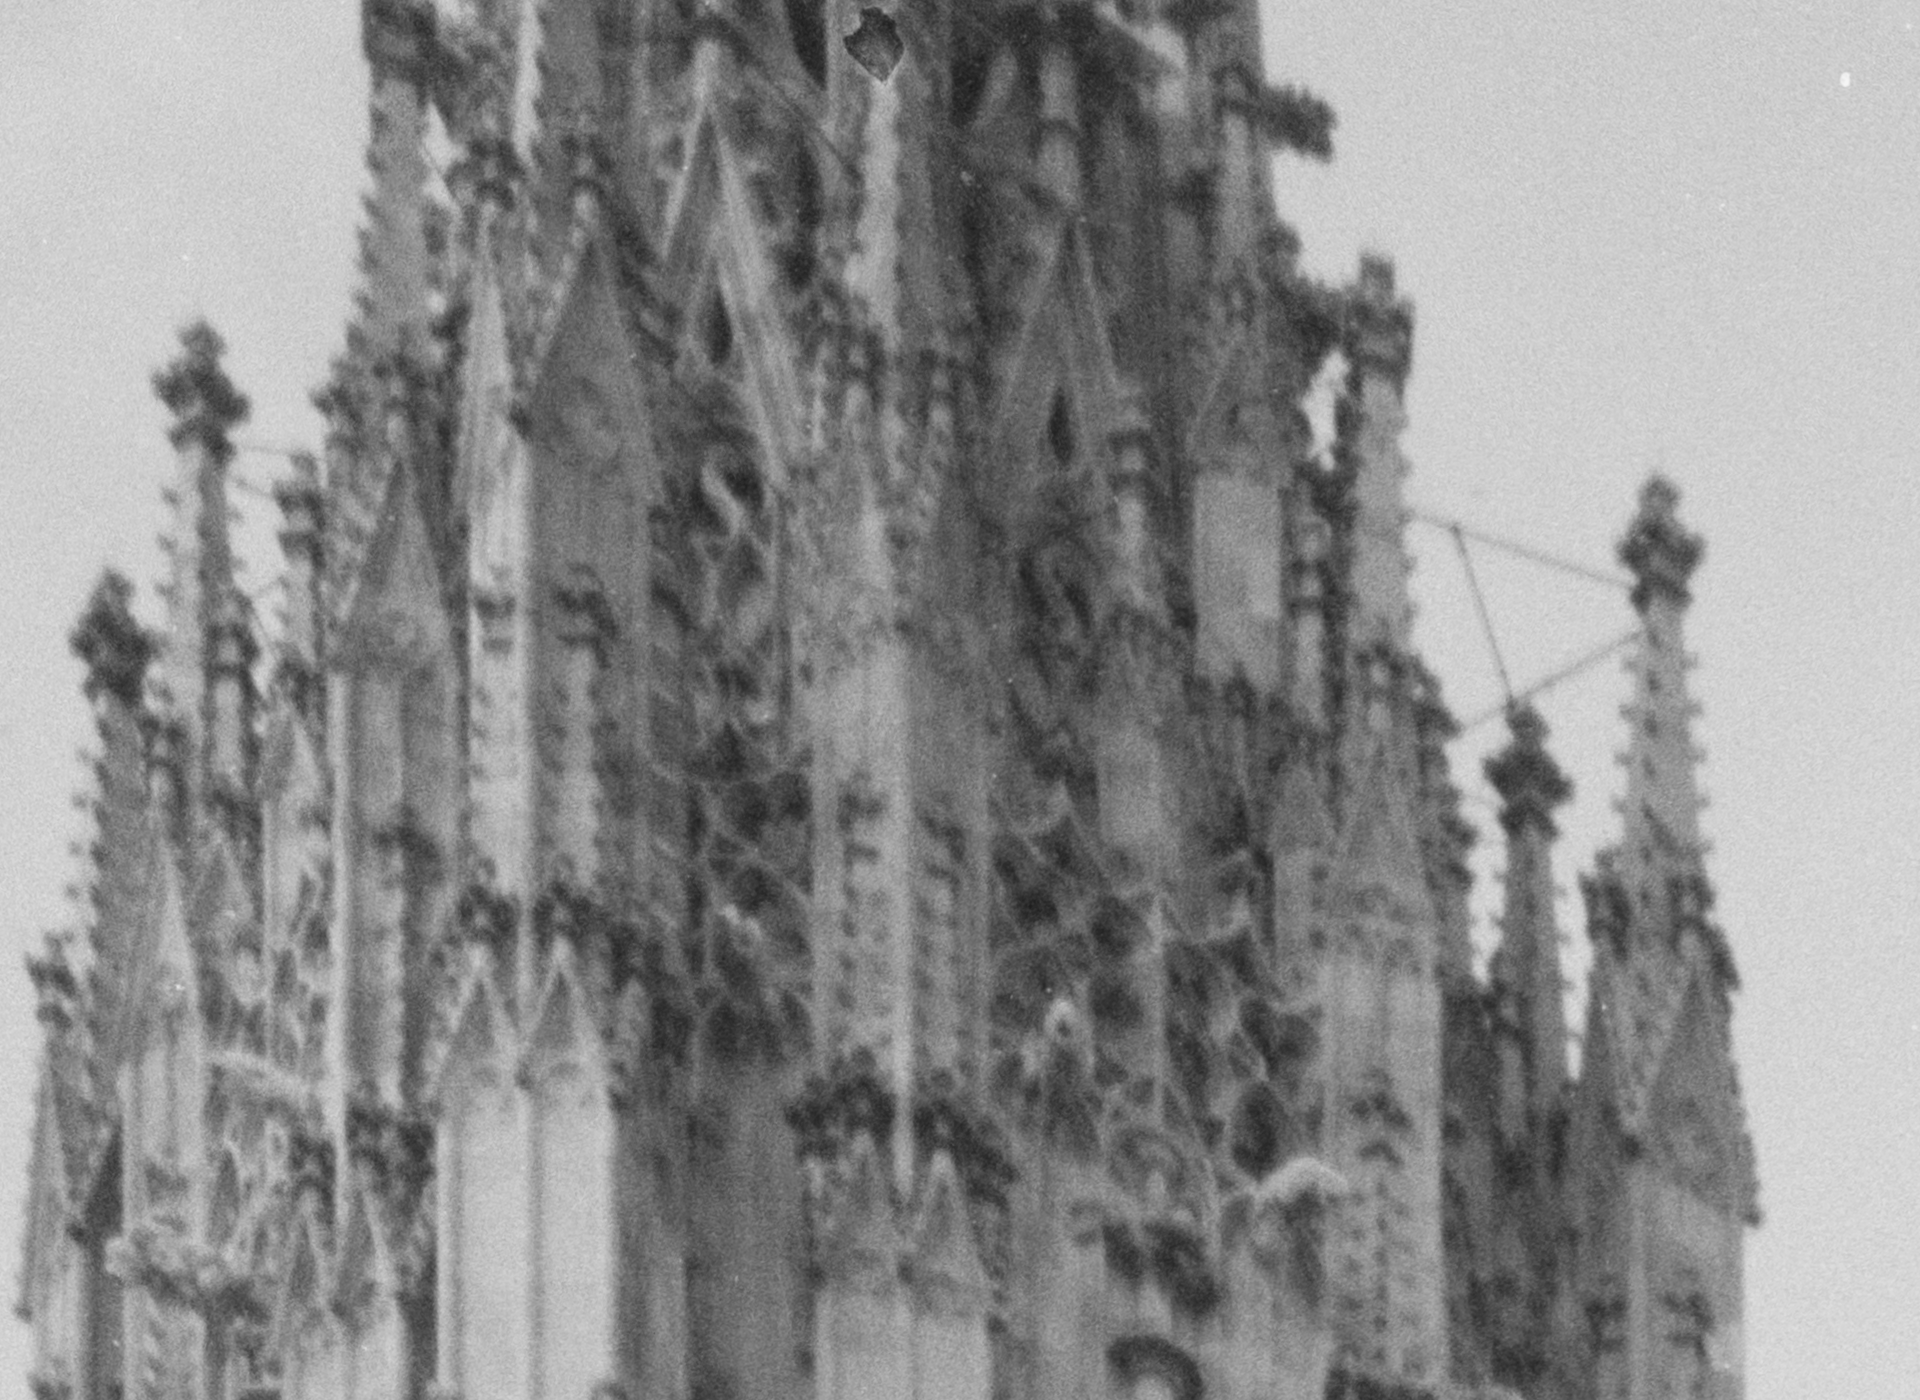
Fine stonework and the surrounding sky. 1,920 × 1,400 source pixels.
Where the details come from
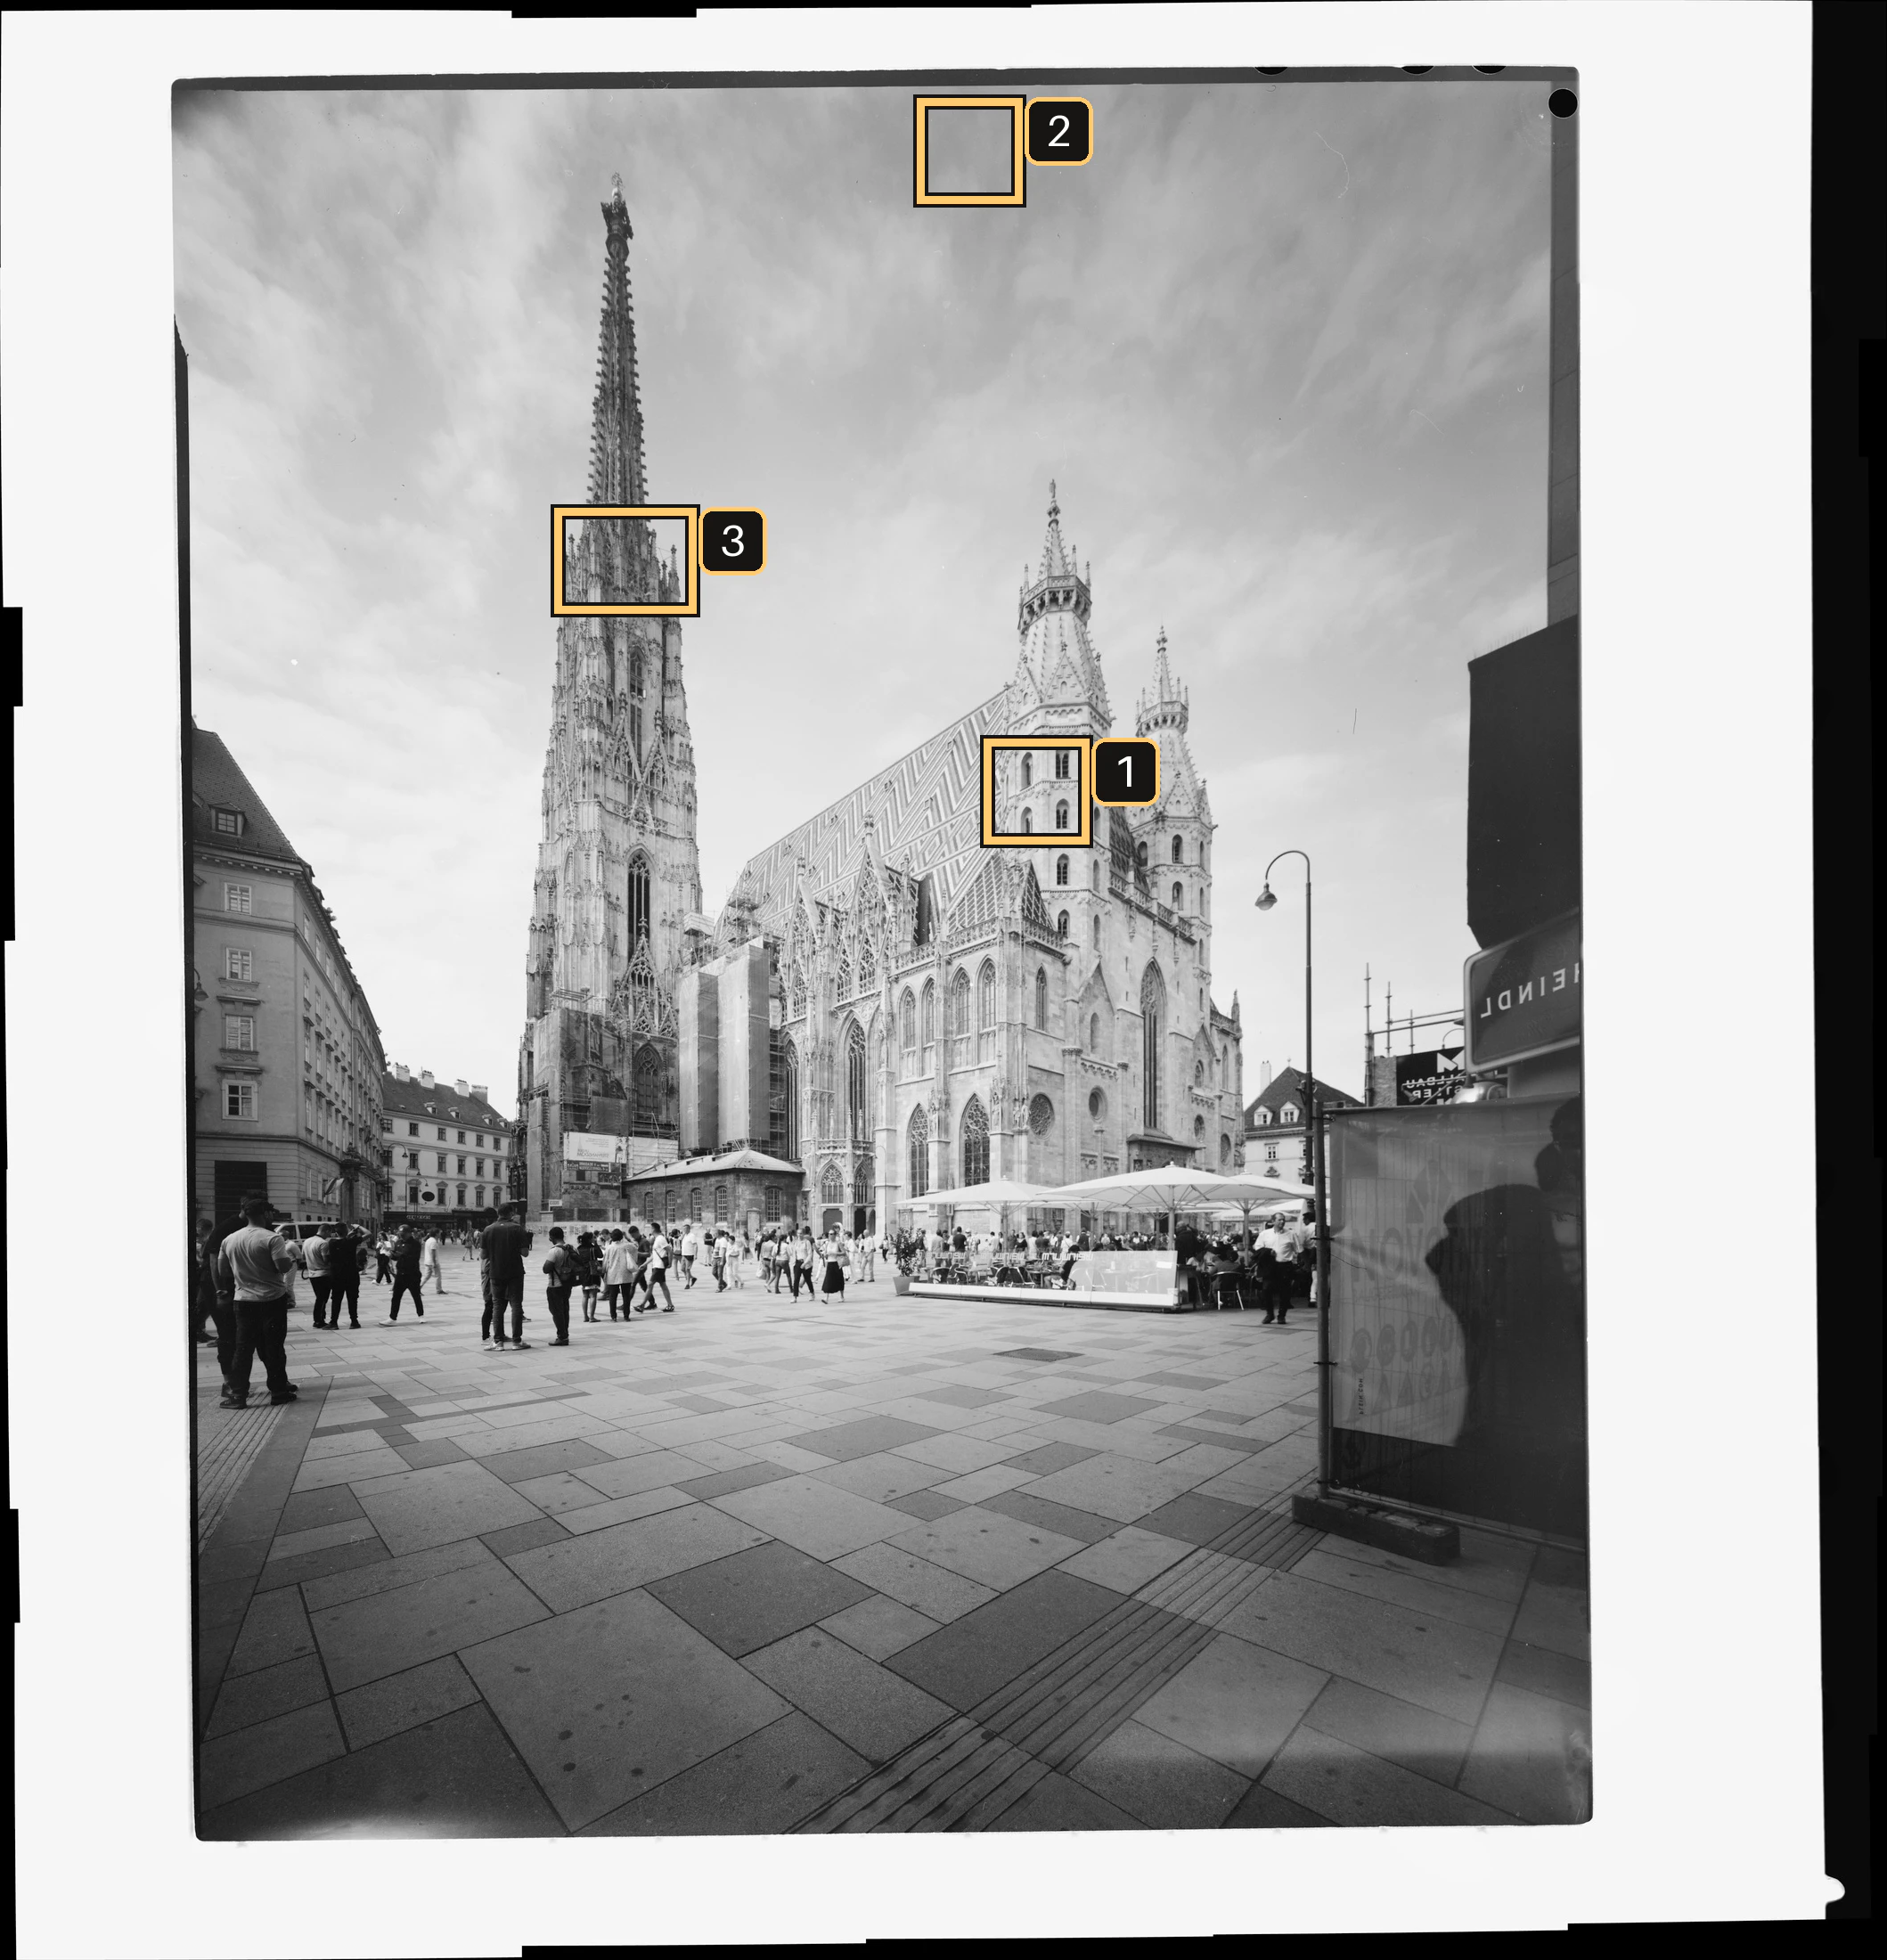
Open the full location map
The full-size details keep the original pixel dimensions, converted to sRGB for web display without resizing or extra sharpening. Only the inline previews are reduced. These are selected areas of one scan, not matched competitor crops or a test of every join.
Source coordinates from the top-left: roof (14,100, 10,600); sky (13,140, 1,450); tower (7,960, 7,300).
About this comparison
The supplied PTGui 13.10 Trial export shows a break in the upper-right film border. Its preview is cropped to remove empty canvas, without rotation or straightening; the border, detached strip and Trial watermarks remain. Open the uncropped PTGui preview.
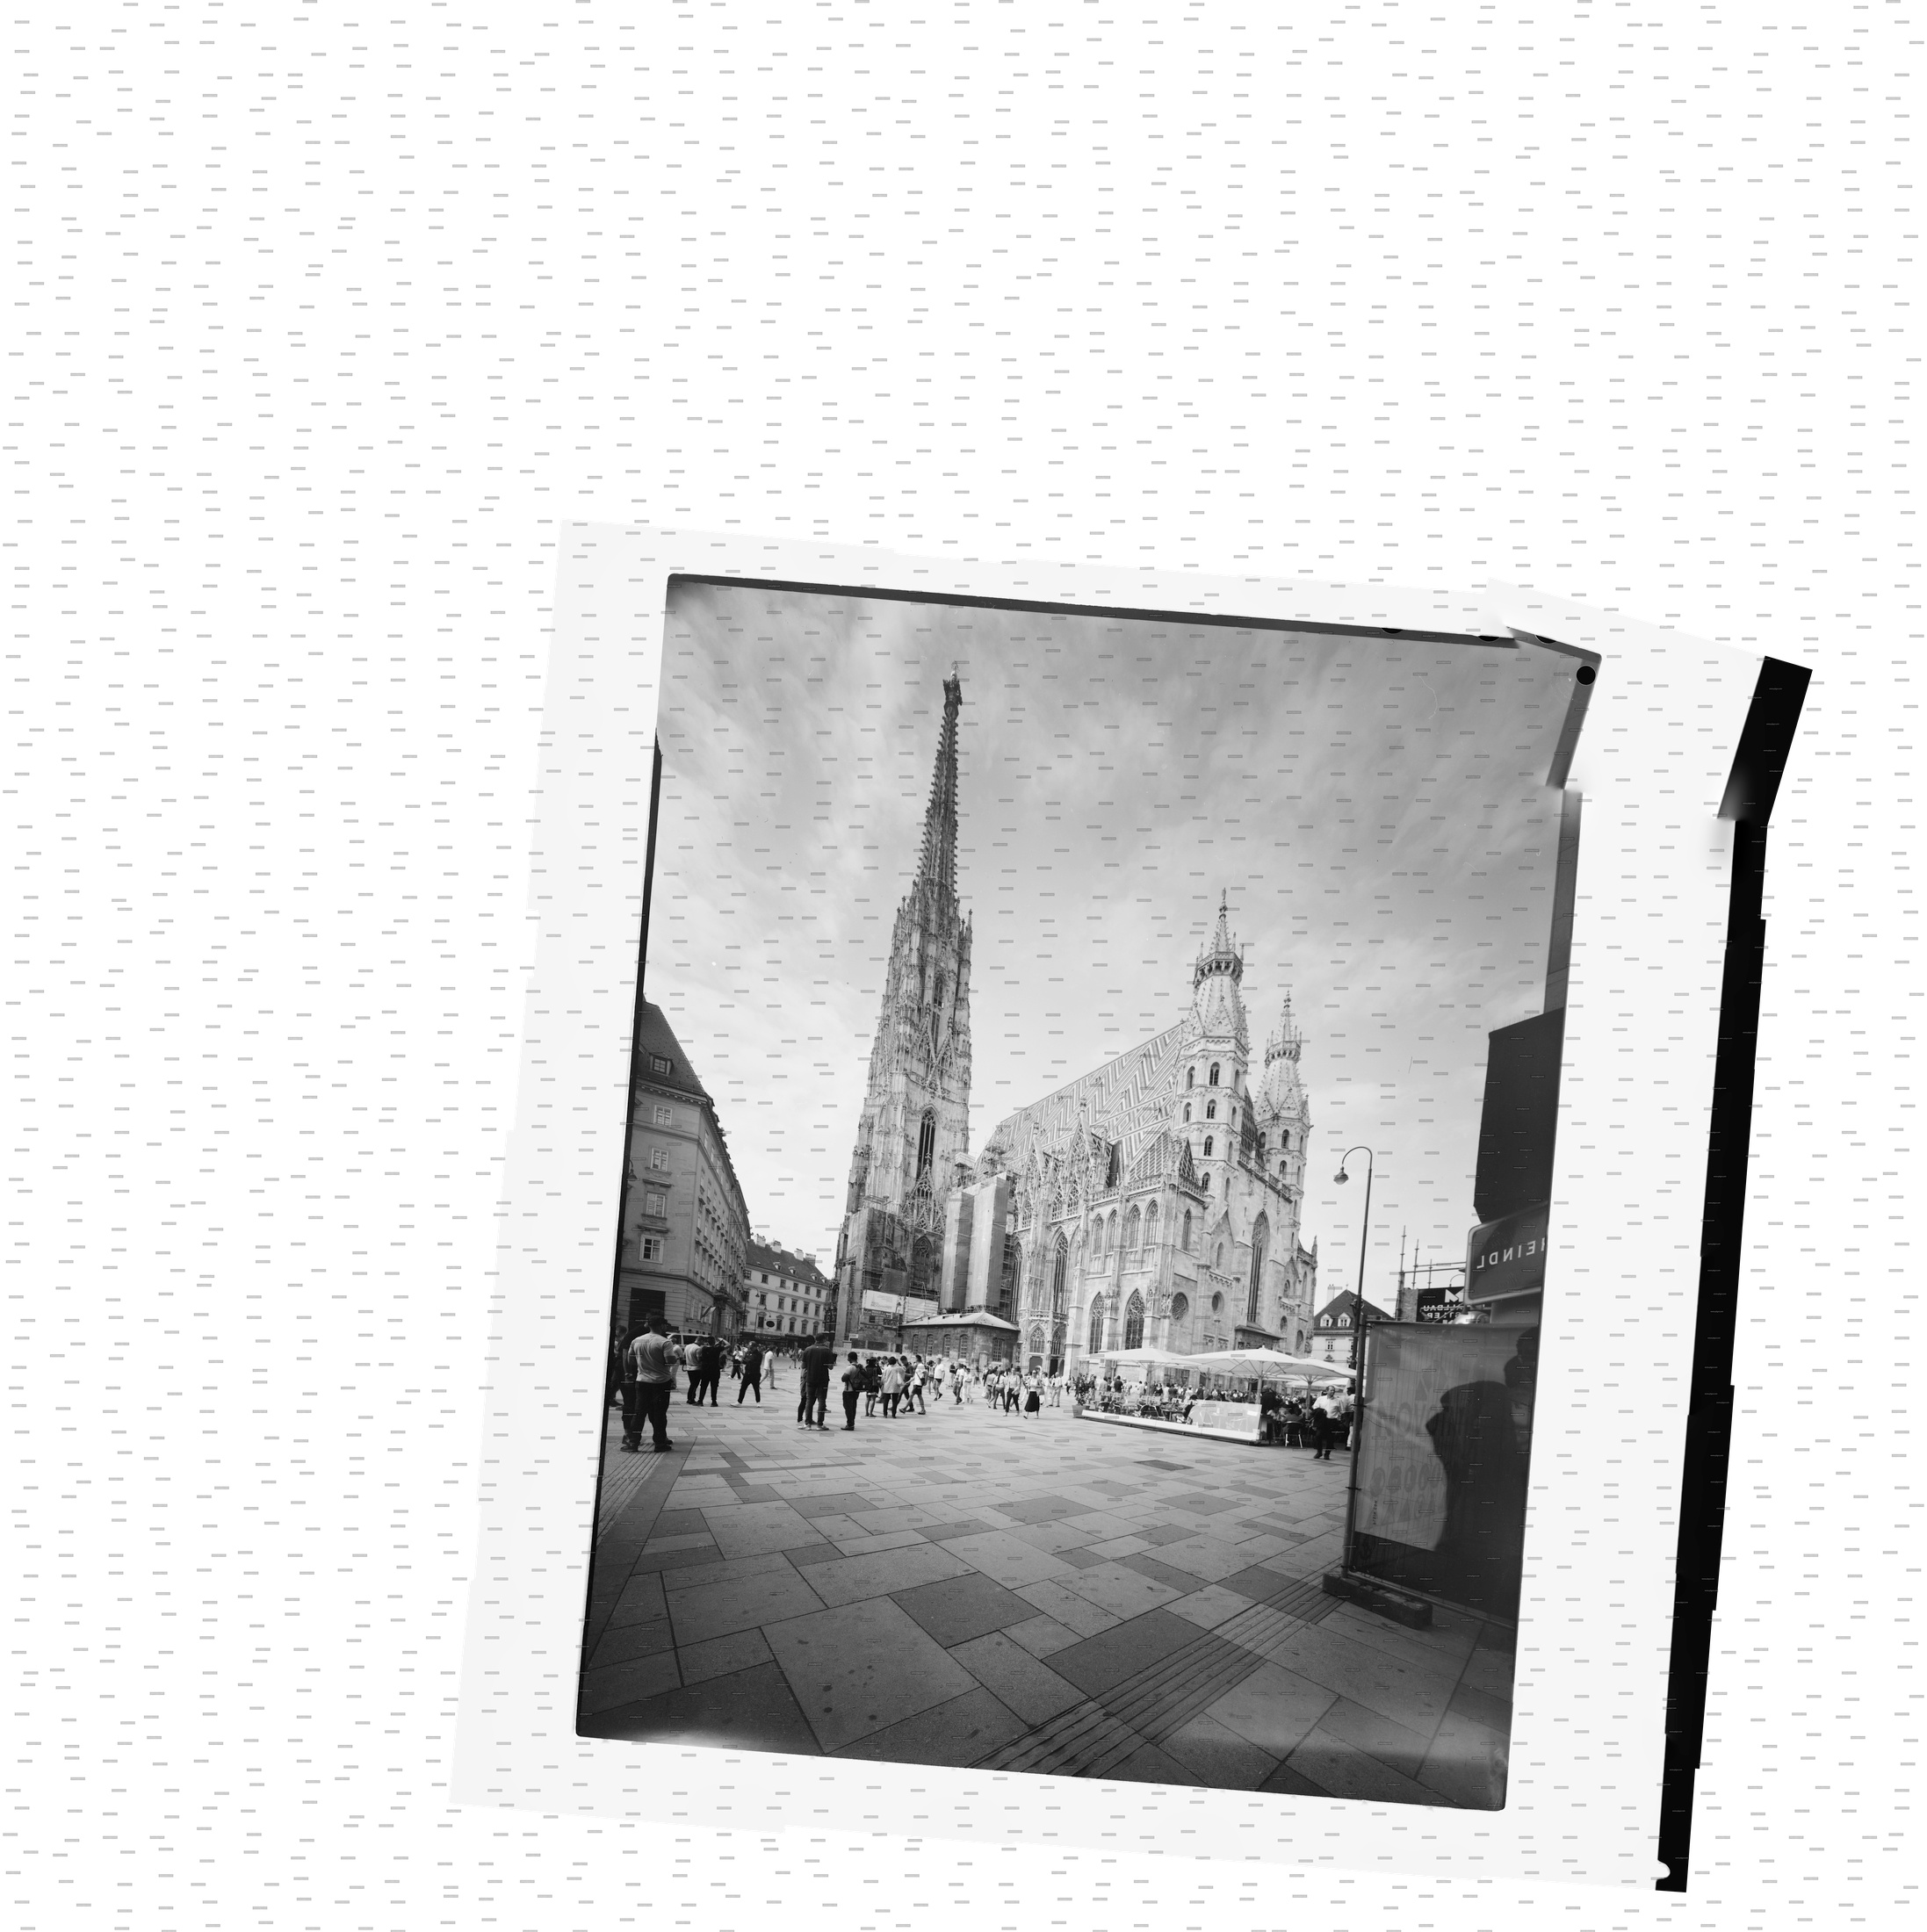
These are recorded results from the same cathedral scan, not a test of every setting or current version. The protected PTGui Trial project prevented a complete independent check of every input. Manual repair and other settings were not exhausted, and PTGui has not been rerun. Trial watermarks are not stitching errors.
This is a recorded EmulsionGrid result, not an independent benchmark. Its roughly 754 MP canvas is an output size, not a measurement of resolved detail or drum-scanner equivalence. These examples do not establish how often either app succeeds on other scans.
The capture companion
Retake a shot. Keep your place.
Plan how to cover the negative and confirm the shot for each position. For a retake, return to that position, choose the replacement and continue where you left off.
Follow the retake
- Plan the shots. Five rows × three columns, with 35% reference overlap.
- Confirm the first two shots. Choose the original for each position, assign it and continue.
- Retake position 02. Choose 623.NEF, then “Replace at 02 & continue”. The earlier 617.NEF stays in the history.
- Return to position 03. The companion resumes at the next unfinished position.
- Take your choices into Develop. After “Finish capture”, review the fifteen assigned originals. “Select captures in Lightroom” sends that set to the plug-in. The recorded Lightroom example shows the same chosen set.
Enlarge the screens and see how the demo was made
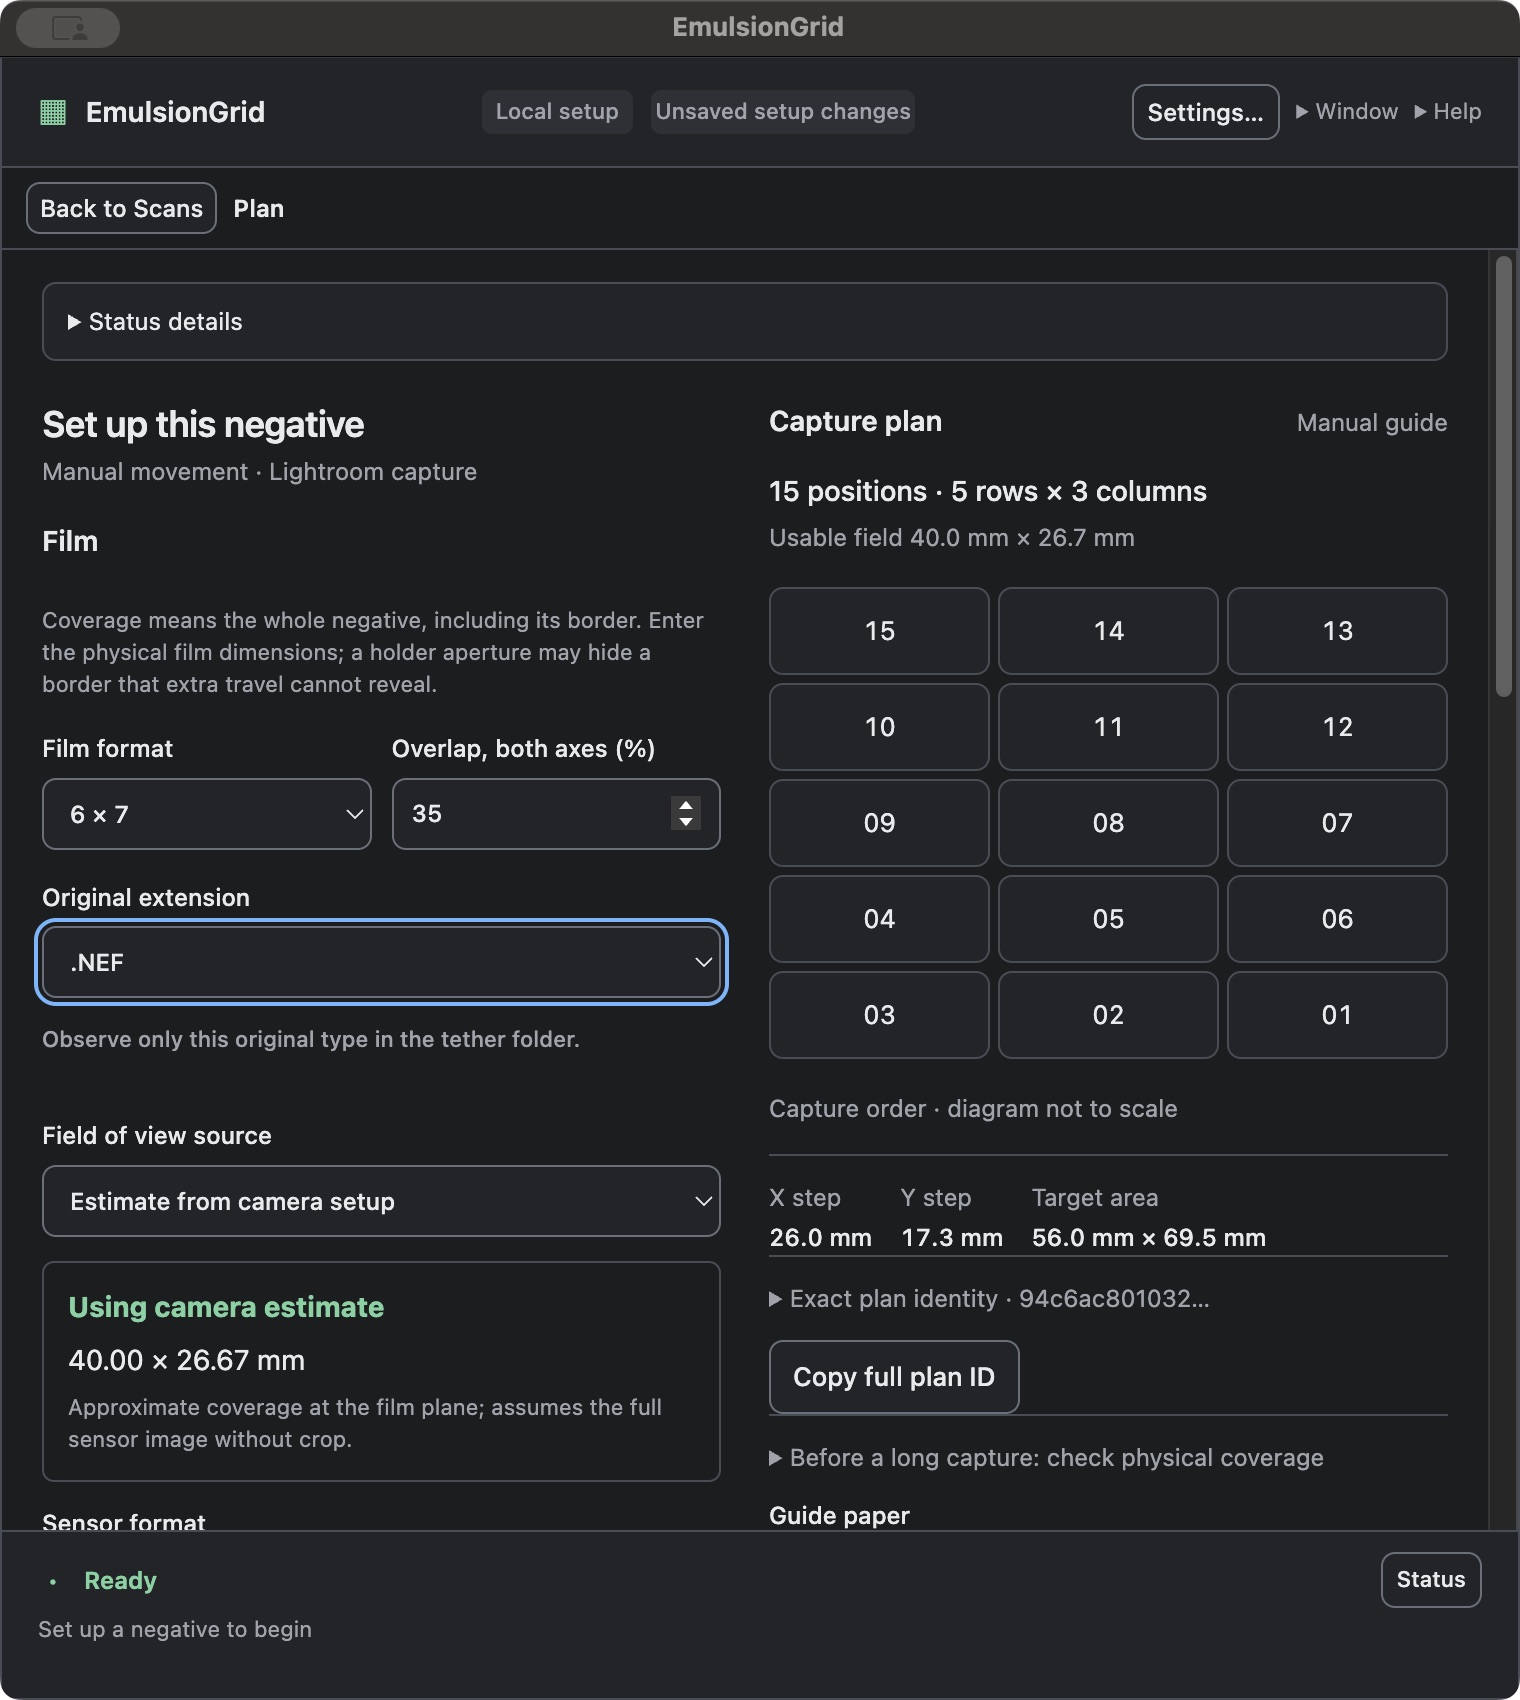
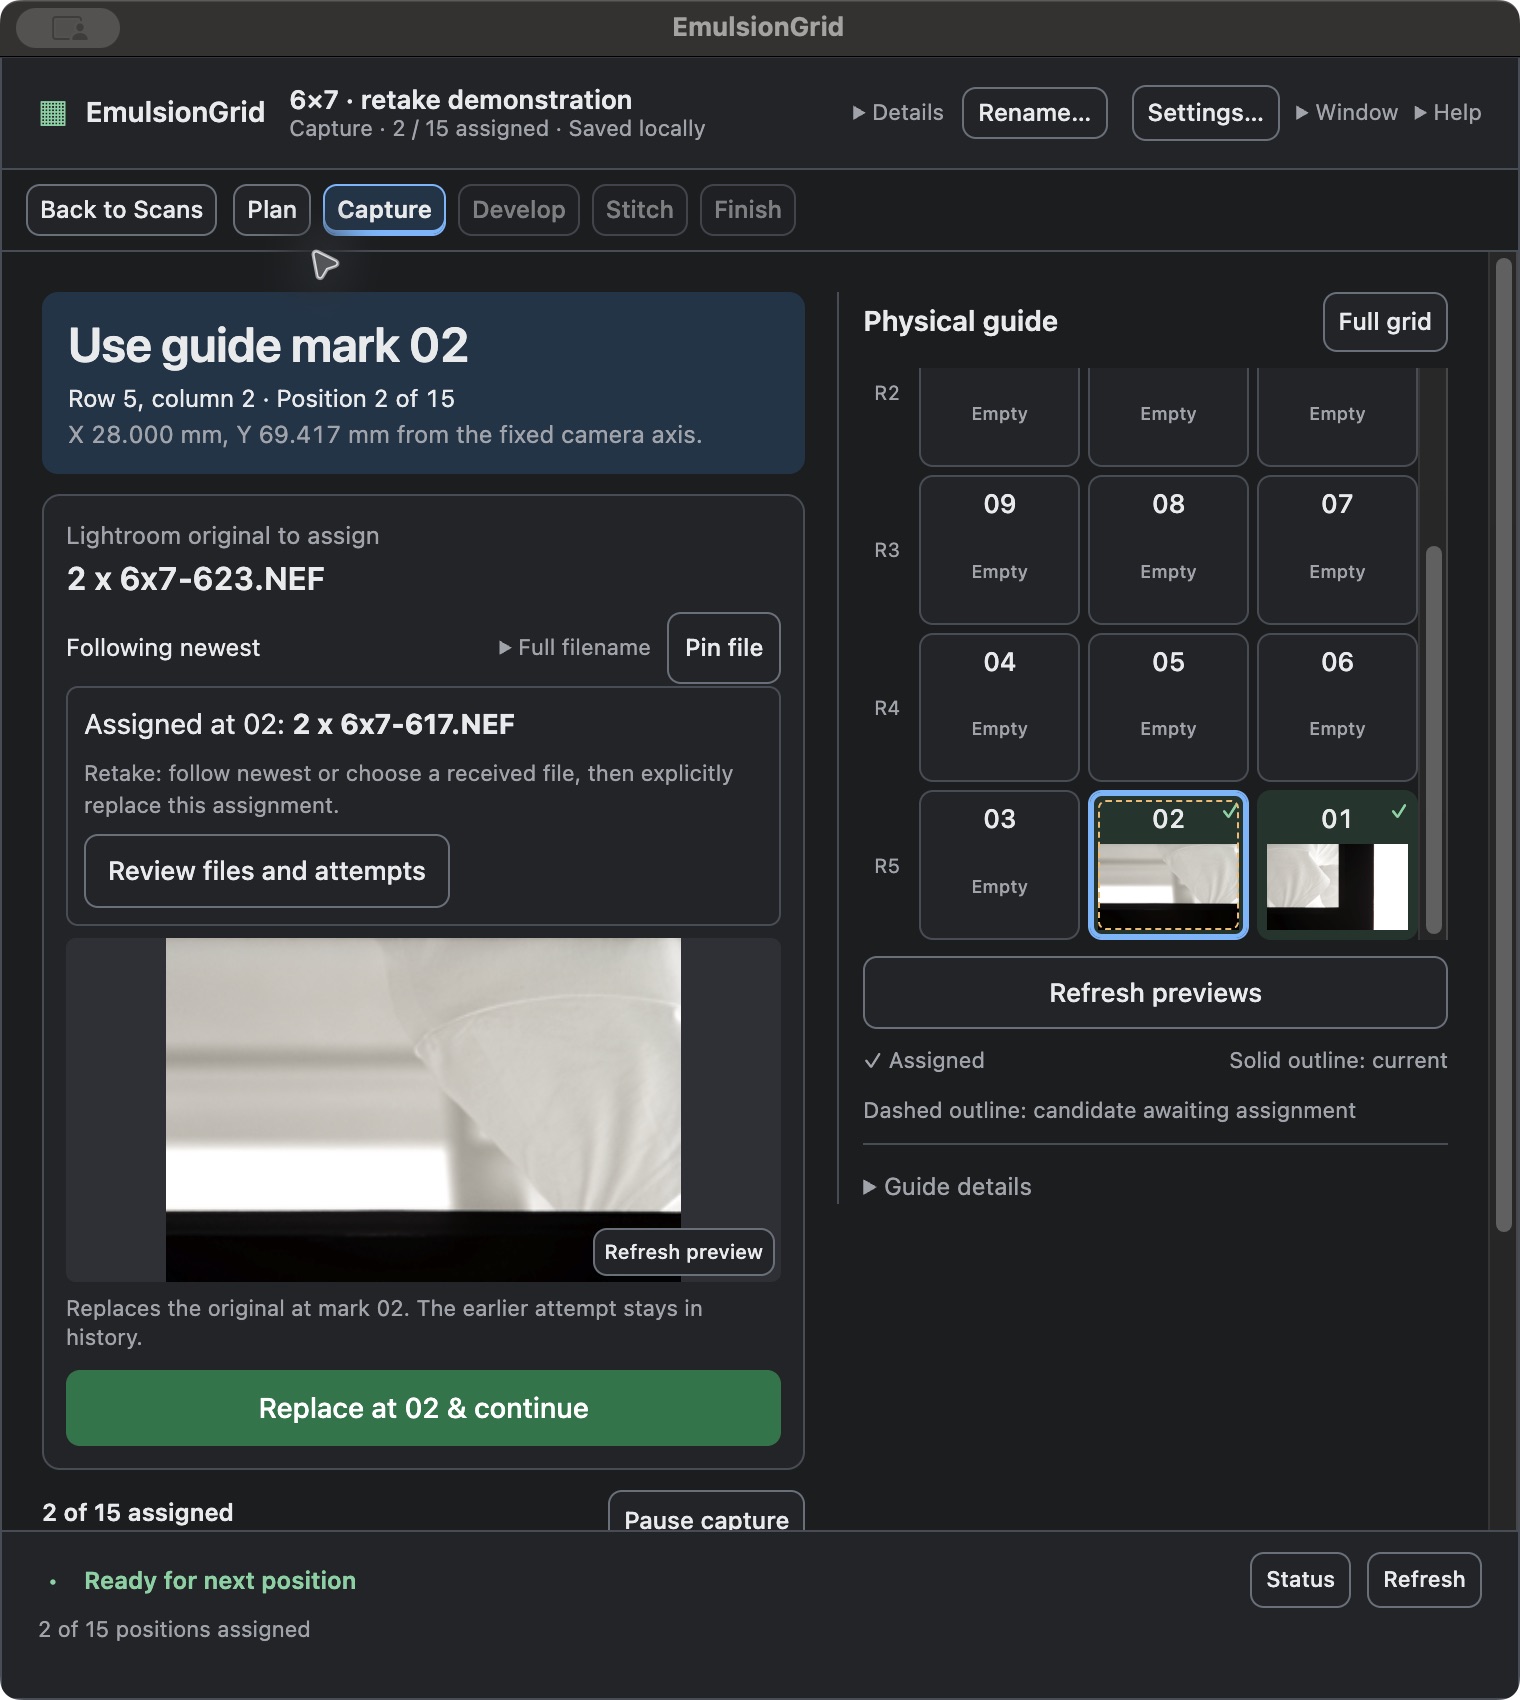
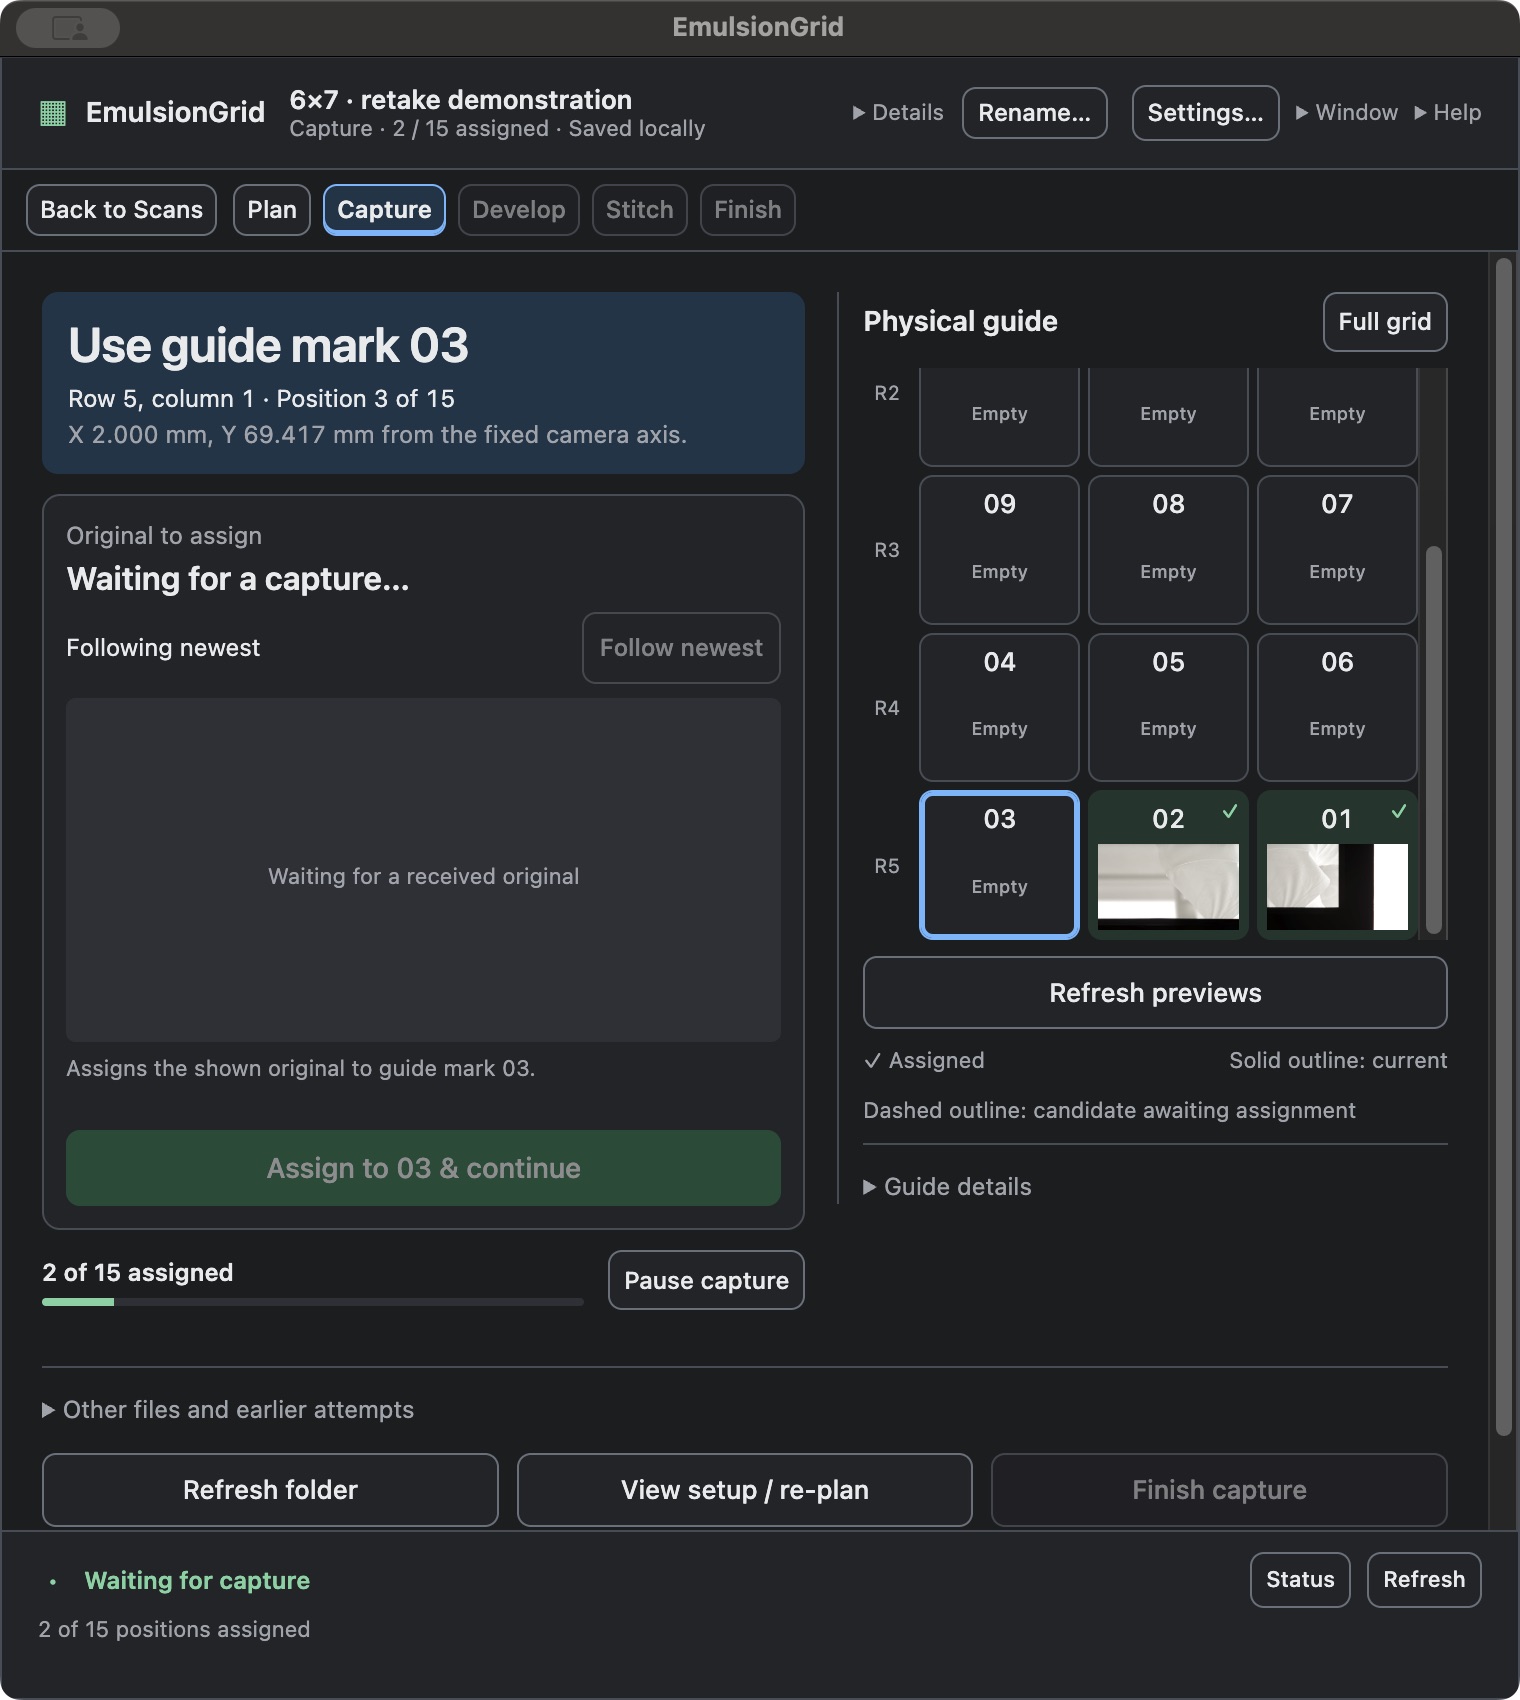
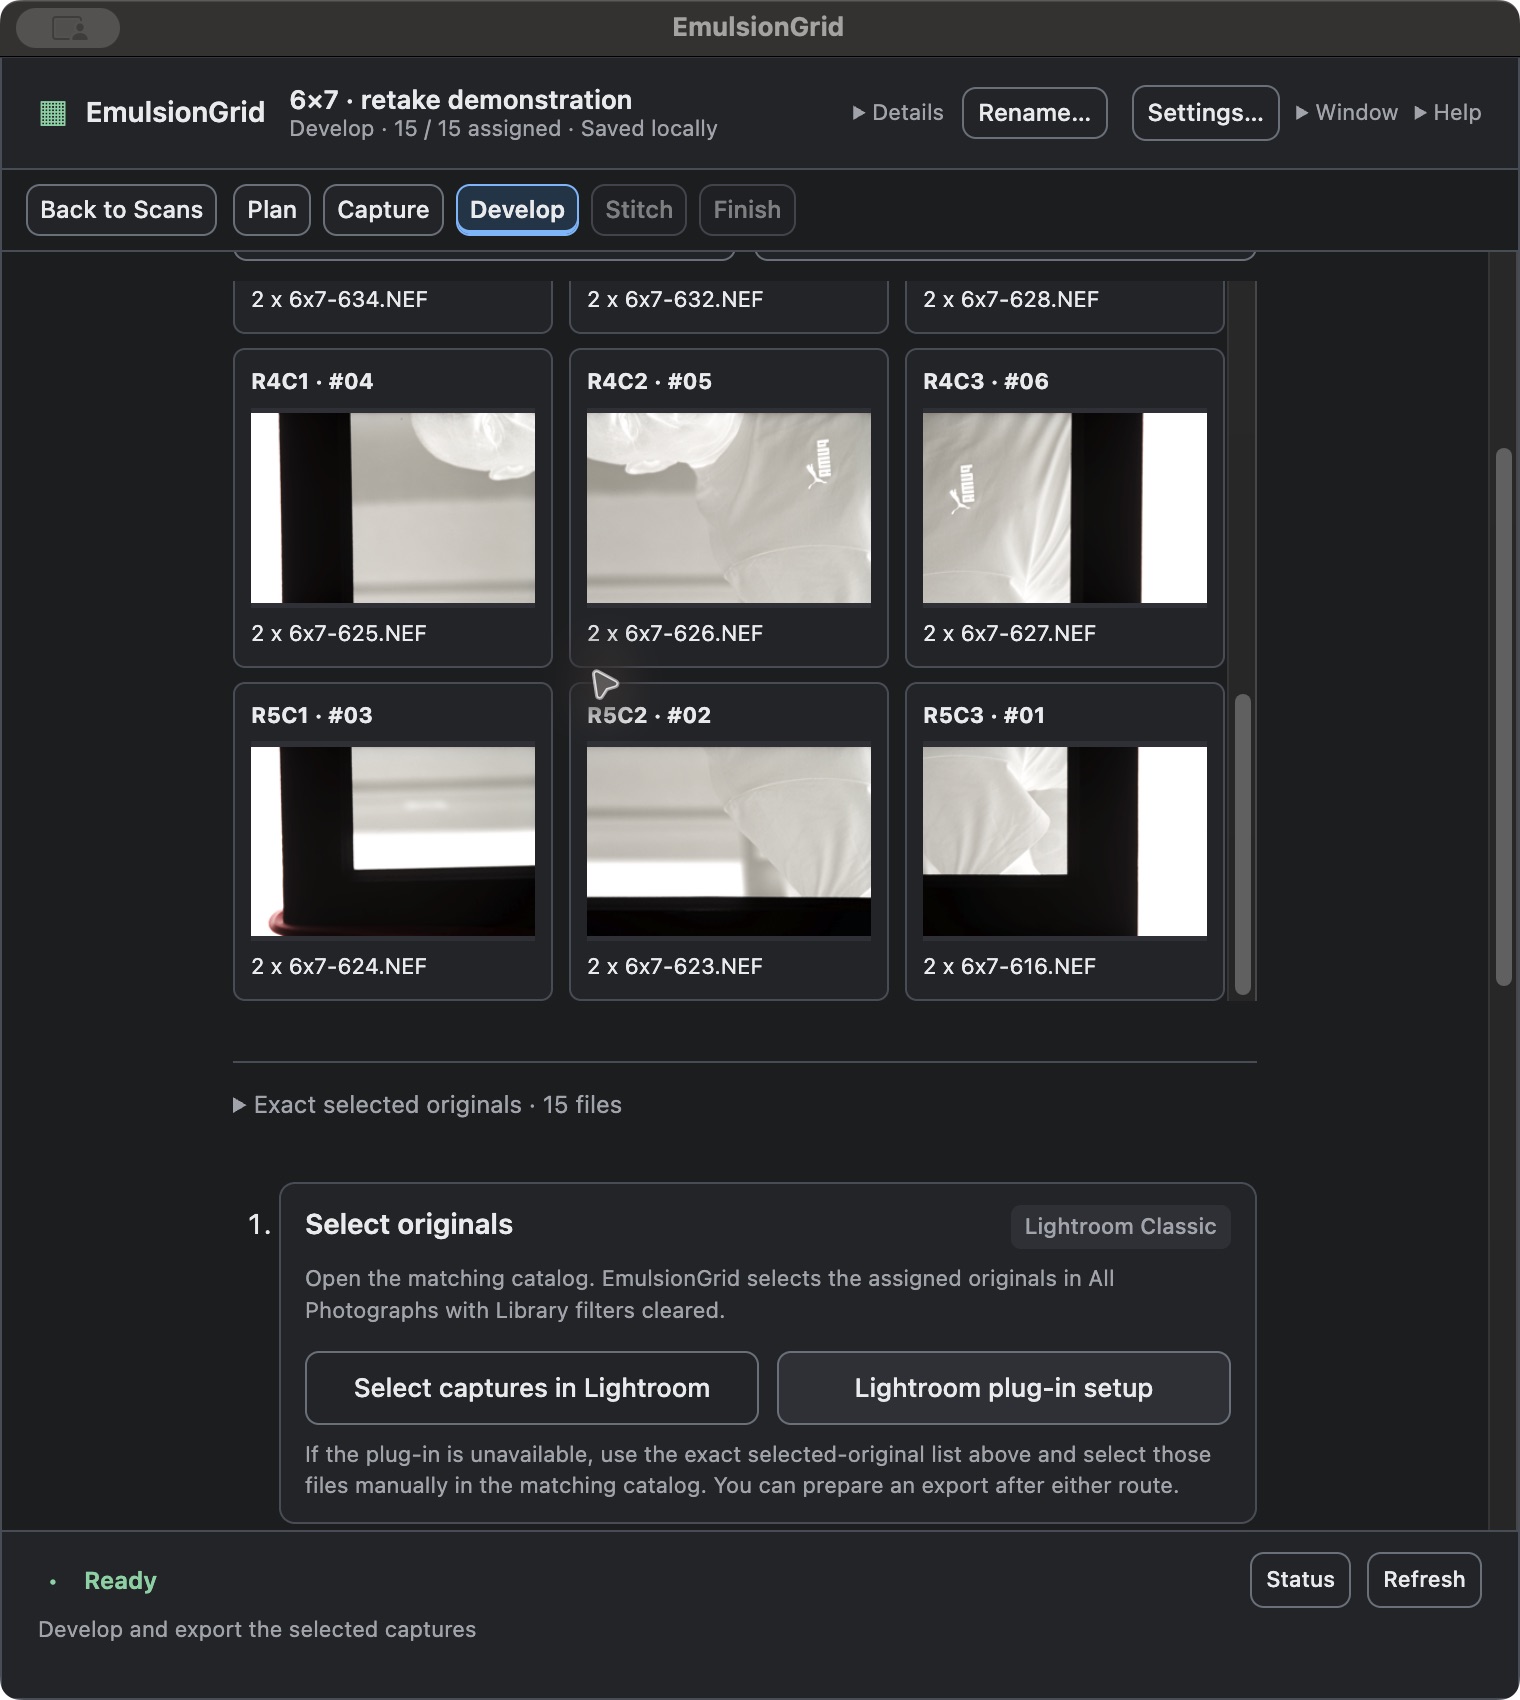
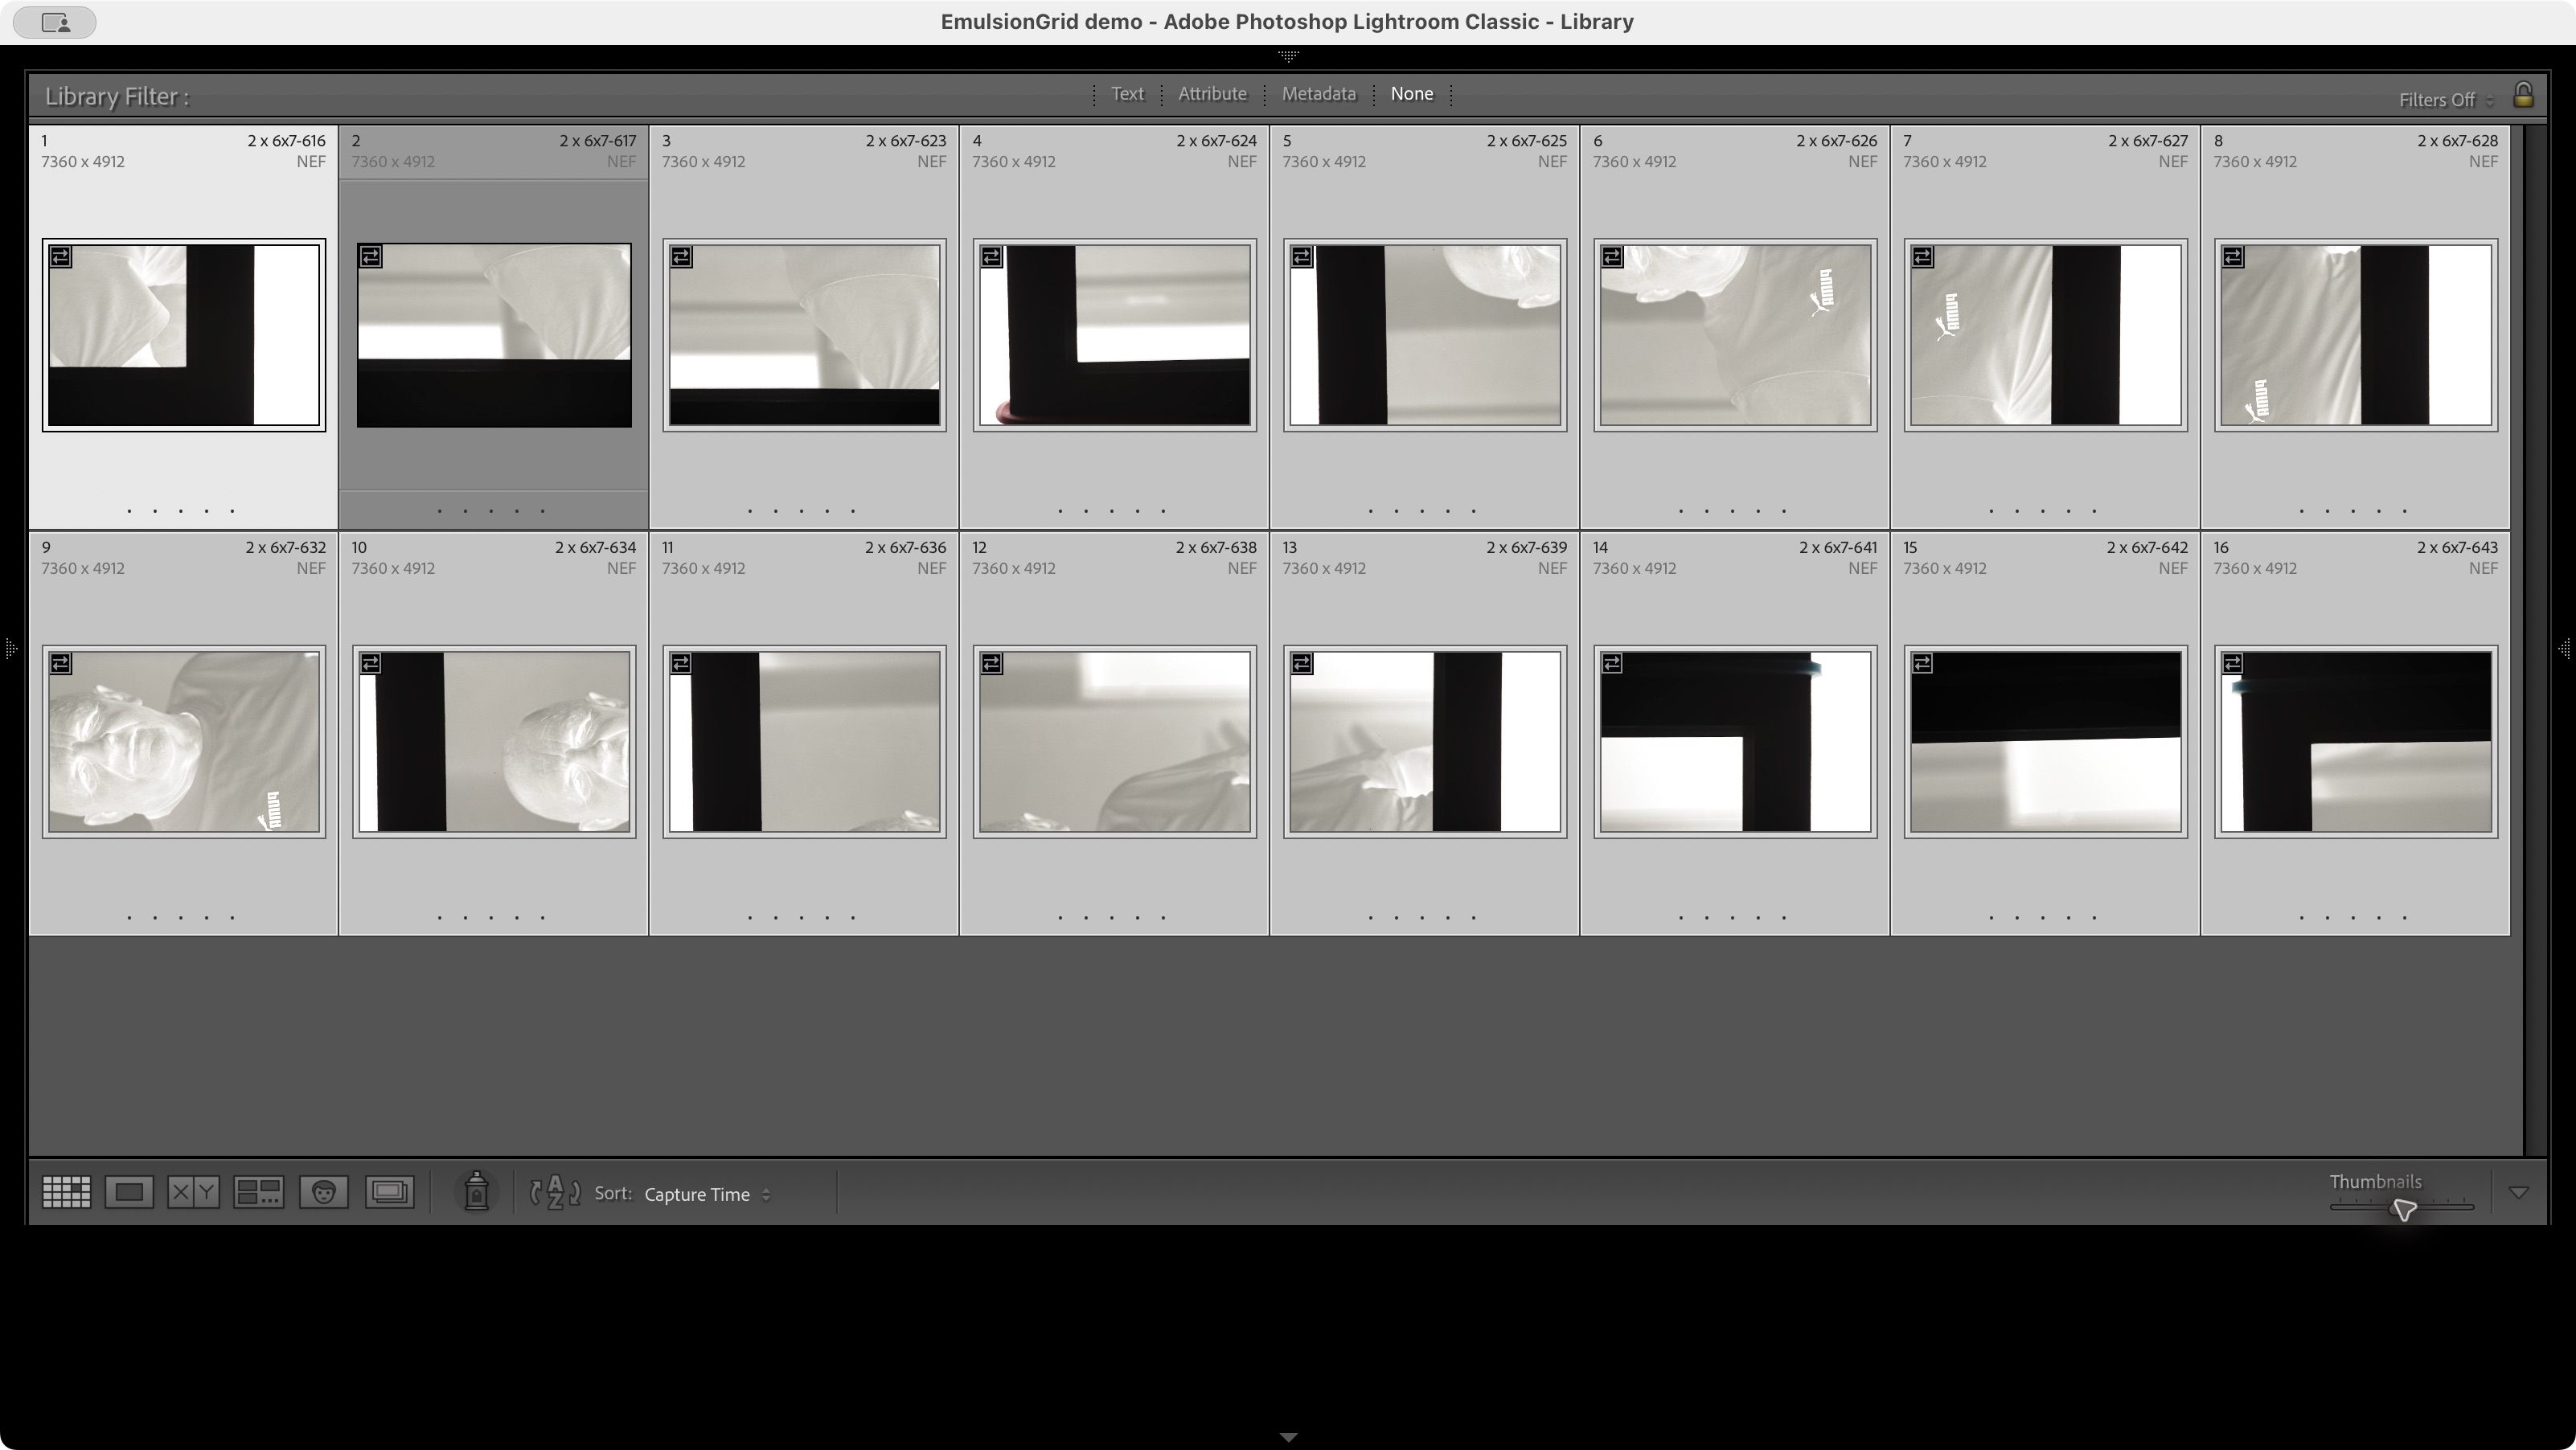
Real app screenshots replay existing camera files; edited durations and a labelled time jump shorten the capture sequence. The recorded Lightroom result shows 15 of 16 originals selected, with the earlier attempt left unselected. Dark RAW thumbnails are shown before negative conversion.
The plan uses saved settings (26 mm horizontal and 17.3 mm vertical steps). Calibration, physical capture, development, export and stitching are outside this recording. See where they fit in the complete workflow.
You choose the replacement; EmulsionGrid keeps track of that choice.
See the complete workflow →Apply for the free Pilot →The film stitcher
Built around one negative, photographed in sections.
The stitcher uses the planned rows and columns to align the shots as parts of one flat film frame. It fits the alignment across the scan, with attention to the shape of the whole image.
Keep the detail you photographed.
The stitching is designed to retain captured grain and fine detail when joining the shots. The lens, focus, film flatness and exposure still determine what reaches the camera.
Inspect the result. Finish in your usual editor.
Open the stitched image from Finish to check the detail and joins. The lossless 16-bit PNG retains the source colour profile, ready for your final edits.
Stitching runs offline on your Mac. No image upload is required.
See the cathedral example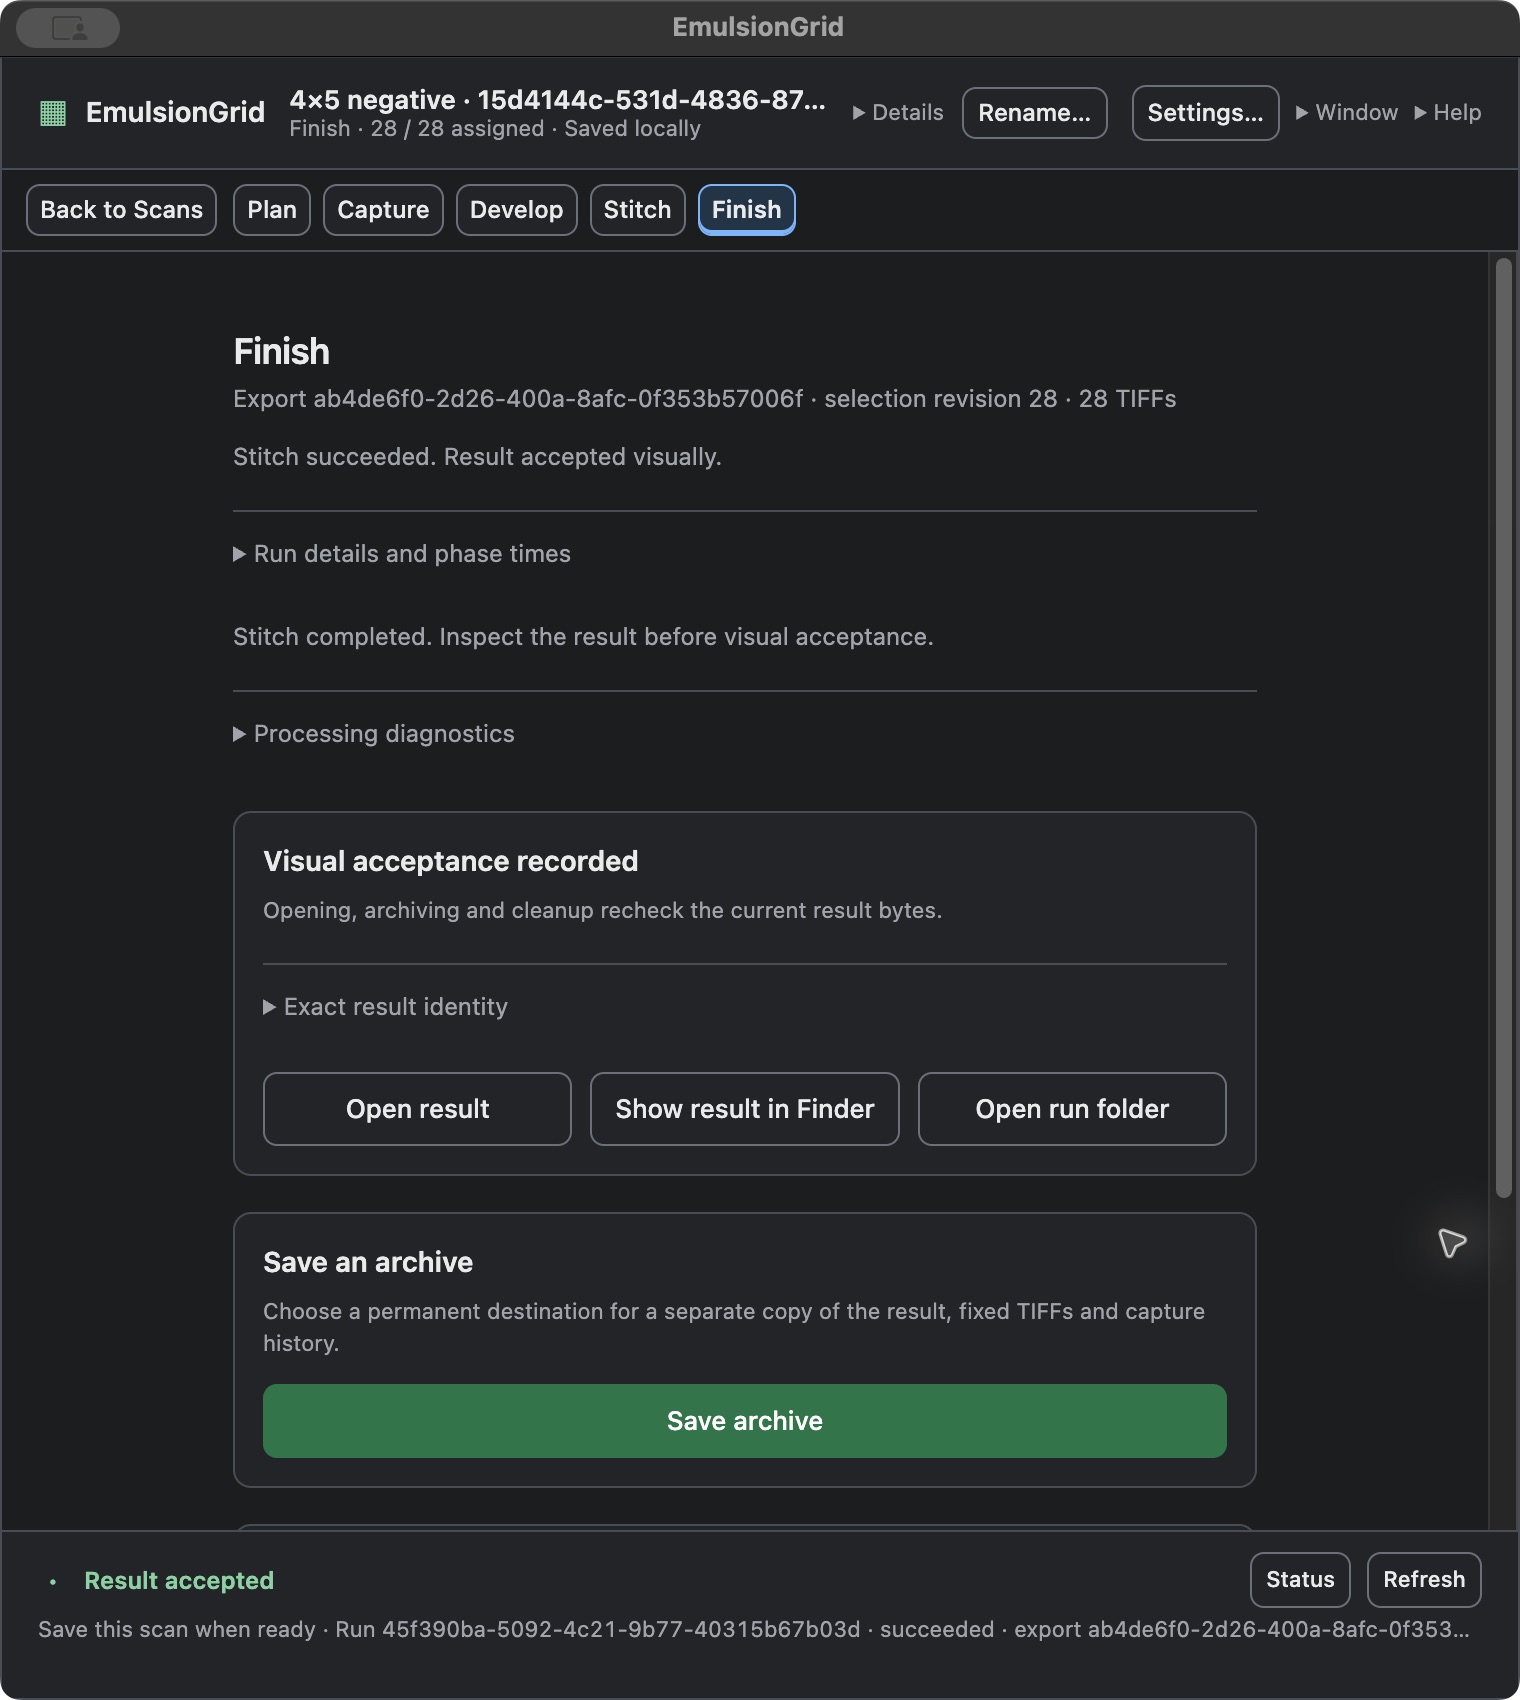
Photograph close up. Cover the whole negative.
Photographing the film in overlapping sections can record more detail than fitting the whole frame into one shot with the same camera. Stitching joins that coverage; it cannot recover detail the camera missed.
How does this compare with Flextight?
In a recorded 6×7 setup, a Nikon D800 at about 0.9:1 magnification gives roughly 4,700 camera samples per inch of film. The estimate is 7,360 pixels ÷ 35.9 mm × 0.9 × 25.4 ≈ 4,687 ppi. It counts samples at the film; it does not measure the detail resolved by the lens and camera.
| Setup | Measure | Value |
|---|---|---|
| D800 at ≈0.9:1 | Calculated samples per inch of film | ≈4,700 ppi |
| Flextight X1 / X5 · 60 mm film | Manufacturer’s maximum optical-resolution specification | 3,200 dpi |
| Flextight X1 / X5 · 4×5 | Manufacturer’s maximum optical-resolution specification | 2,040 dpi |
The X1/X5 35 mm specifications are higher: 6,300/8,000 dpi. Sources: Hasselblad’s X1/X5 datasheet, page 4 and Nikon’s D800 specifications.
These figures do not compare overall scan quality. A comparison of the same negative is still needed before claiming that either approach produces better scans or reaches drum-scanner-level quality.
The complete workflow
From your camera to your finished scan.
Set up your movement guide
Photograph a calibration target where the film sits. Review the automatic measurement, or mark known distances manually if needed. Combine it with your negative size and overlap to create a tailored movement guide. Reuse the calibration while your setup stays unchanged; recalibrate when it changes. Update the guide for a different negative size or overlap.
Before a long scan, check that the guide covers the full border and any extra space you need. The Pilot has not verified that coverage.
For each scan · you move the film and choose the shots
Capture and select
Follow the guide and confirm each shot in the companion. When you retake a shot, choose its replacement. The companion’s Lightroom Classic plug-in selects your chosen originals from the catalog containing them.
Develop and export
In Lightroom Classic or your usual photo editor, develop the RAW files, convert negatives and export 16-bit RGB TIFFs. Negative conversion is not included in EmulsionGrid.
Stitch on your Mac
Join the prepared shots into one detailed image in EmulsionGrid.
Inspect and finish
Check the image and joins, then finish the PNG in your usual editor.
Before you apply
Start with your setup and one scan.
The Pilot is for photographers who already make camera scans. Tell us your film size and what gets in your way: planning the moves, keeping track of shots, handling retakes or joining a difficult scan.
- Your Mac
- The Pilot targets Apple Silicon Macs with macOS 15 or later. Include your model and memory so we can check the fit for your scans.
- Film sizes
- Enter your own film dimensions for formats such as 645, 6×6, 6×7 and 6×9. Tested examples reach 4×5 inches. Larger formats are expected to use the same workflow, but have not yet been tested.
- Your photographs
- A complete set of overlapping shots covering one negative, exported as 16-bit RGB TIFFs for stitching.
- Your equipment and editing tools
- You provide the camera, lens, film holder, light and stable positioning, plus tools for RAW development and negative conversion. Lightroom Classic is needed for the demonstrated selection handoff, not for stitching prepared TIFFs.
- Pilot access
- Pilot licences are not being issued yet. Once issuance opens, selected testers can evaluate the capture companion and film stitcher with a 30-day offline licence for one Mac and macOS account. We’ll confirm the supported setup before arranging access.
Free 30-day Pilot · by invitation
Apply to try your own scan.
Tell us about your setup and one scan you’d like to improve. Pilot licences are not being issued yet; you can apply now for future access.
Apply by email. There’s no purchase required to apply or take part in the Pilot.
Planned commercial release · optional purchase
€199Planned commercial price
Once for a perpetual v1 licence
Including VAT
€149Pilot tester price
Once for a perpetual v1 licence
Including VAT
Try your own scans and share feedback to qualify for the €149 price—including telling us where you got stuck. Purchase is optional.
The licence covers the capture companion and film stitcher. We’ll confirm licence, support and purchase terms before you buy.
- Tell us about your Mac, scanning setup and one difficult scan.
- Once issuance opens, selected testers receive a free 30-day offline licence to try the workflow with their own files.
- Share what worked and where you got stuck.
Opens your email app. You can also write to contact@emulsiongrid.com.
Prefer webmail? Copy these prompts.
To: contact@emulsiongrid.com
Subject: EmulsionGrid pilot application
Mac model, memory and macOS version:
Film format and camera-scanning setup:
One obstacle I would like to solve:
Select and copy this text into your email. A short description is enough; no full-resolution files are needed.
Before you decide
A few practical questions.
How does the Pilot differ from buying v1?
Pilot licences are not being issued yet. Once issuance opens, selected testers receive a free 30-day offline licence to work with their own scans. Downloading the app does not start that period. At commercial release, testers who try their own scans and share feedback can buy a perpetual v1 licence for €149 once, including VAT. Reporting what prevented you from completing a scan counts as feedback. The planned commercial price is €199 once, including VAT. Purchase is separate and optional.
The perpetual v1 licence would include any 1.x updates we release. A future v2 would be an optional paid upgrade. We’ll confirm the licence, support and other terms before you buy.
Do I need to upload my images?
No image upload is required for stitching. It runs locally on your Mac and works offline with a valid licence. Applying and arranging access happen by email.
Can I use an Intel Mac?
The Pilot targets Apple Silicon Macs with macOS 15 or later. Intel Macs, including those with a T2 chip, are outside the Pilot scope.
What if I replace my Mac?
The current licence is linked to one Mac and macOS account. A new Mac needs a replacement licence; copying the app does not transfer its registration. We’ll confirm the replacement terms before payment.
What can I try in the demo?
Download the Mac ZIP to explore the built-in offline demo: plan a scan, track captures and simulate retakes without a licence. Lightroom Classic selection and stitching your own scans require a separately issued Pilot licence. Pilot licences are not being issued yet, and downloading does not start the 30-day period.